Beer Syndicate Blog

Shamelessly Promoting Beer

Month: September 2015

How to Save a Bad Batch of Homebrew- Part 2

[Read part one of this article, How to Save a Bad Batch of Homebrew- Part 1, and learn how to save an “infected” beer.]

What to Do With a Stuck Brew

I was enjoying a pint of beer and chatting with a commercial brewer when the topic of stuck fermentation came up.  (By the way, a stuck or stalled fermentation refers to beer that does not fully attenuate to the targeted final gravity for some yeast-related reason.)

Turns out this brewery was sitting on a formidable batch of American Barely Wine that hadn’t completely fermented out and as a result was unable to be sold.  The brewery had tried all the standard tricks to get the beer un-stuck like pitching more yeast, raising the temperature of the fermentation tank, and other tips mentioned in the article How to Beat the Stuck Fermentation Monster, but nothing was working and they were left facing the very bleak reality of having to dump the entire batch.

And big badass Barley Wines ain’t exactly cheap to make either.

I asked if the brewery in question had ever thought about blending the under-attenuated beer with some other beer they had on stock (or could quickly whip up), to which the brewer replied, “Now there’s an idea.”  We also talked about the possibility of pitching a cleaner variety of Brettanomyces (Brett) to break down some of the longer chain dextrin sugar molecules that typical Saccharomyces ale strains do not, thereby lowering the final gravity of the beer into a more palatable range.

Of course there was concern about Brett getting loose in the brew house and infecting other beers because even though Brett is a yeast and not a lactic acid producing bacteria like Lactobacillus or Pediococcus, it is no ordinary yeast and can be noticeable in very small quantities in beer.  Not to mention, there were worries about exactly what types of esters and other aromatic characteristics Brett might impart.

Caution be damned: the brew house opted to execute Operation Brett.

Three anxiety-ridden months later, I’m happy to report, the stuck fermentation was no more and the beer in question was flowing on tap and customers were throwing down a premium for a taste of this delicious imperial brew that narrowly escaped the drain.  The beer itself wasn’t Brett-funky nor was it cloyingly sweet, but it lacked the pronounced hoppy character you might expect from an American Barley Wine, but by no means was it a drain-pourer.

The Lost Abbey Barrel Room

While some breweries shun potential beer spoilers like Brettanomyces, others like The Lost Abbey embrace it as noted on the plaque above their barrel room which states “In Illa Brettanomyces Nos Fides”, which translates roughly from Latin as “In the Wild Yeast We Believe”.

Now, if you plan on calling Brett to the rescue in the case of a stuck fermentation at the home level, I would consider having at least a separate set of tubing when using Brett to help prevent cross-contamination, but to play it safe, a different set of plastic or vinyl equipment for any Brett or bacteria beer wouldn’t be a terrible idea either.

If working with Brett is a bit out of your comfort zone, you may be able to blend your way out of trouble too.  The end goal or every blended beer may be different, but in the case of a stuck fermentation, it is usually to balance your overly sweet beer with a drier beer.  It’s up to you whether you want to try and blend in a completely different style of finished beer or simply a more sessionable version of your under-attenuated one, but the key is to blend and measure small incremental amounts of the two (or more) beers together in a separate smaller vessel (like a measuring cup) and then to taste the blend at every incremental addition in order to obtain the proper ratios and desired flavor profile because the final ratio may not be a straight 50-50 blend.

Shandification, Hopification and Coffeefication: Magic Tricks for Meh Beer

Ladies and gentlemen, for my final trick, I will demonstrate how to transform a meh beer into something, potentially, truly spectacular. Of course “meh” beers aren’t necessarily bad per se, but they’re not exactly all that great either, so in some cases, it pays to know a bit of brewer’s magic.  In all cases below, we are essentially trying to mask some off-characteristic(s) of a less than stellar beer.

Shandification:

Story time: Back in the summer of 2011, I brewed a Belgian Wit spiced with the typical combo of coriander and bitter Curaçao orange peel, but tweaked it by adding a touch of dried rose buds and Osmanthus flowers (which contribute notes of apricot and peach).  The aroma wafting from the fermentor smelled like glorious success, but after sampling the beer post bottle conditioning, let’s just say, Hoegaarden it was not.

Disappointed but not defeated, I thought, it being summer time and all, why not see about turning this brew into a shandy-type thing, i.e. beer mixed with lemonade, or some other citrusy juice— heck, even grapefruit juice would work.

So I picked up a few gallons of quality premixed limeade, filtered out the pulp, dumped a couple gallons of limeade in the bottling bucket, popped the caps on about two gallons of the meh Wit beer, mixed it with the limeade, and bottled again.

I figured there’d be enough yeast in the bottles to ferment the limeade, and I was right.  Explosively so.

Three days later, a bottle bomb went off.

Luckily my shandy “exBEERiment” was packaged in closed beer boxes so tiny shards of glass didn’t find their way into my eyeballs, but I learned a valuable lesson that day: don’t add an unknown amount of sugar (in this case from the limeade) to your beer right before bottling.

Once again, I popped the caps off all the bottles, poured all the shandys into a fermentor, and this time I waited a week or two until fermentation was complete before bottling for the third and final time.

The result?  Awesomely complex, sour lime shandy.  Off flavors?  None detected.  Was the acidity in the limeade too much for the yeast to ferment or was there too little yeast from the bottles to do the job?  No and no.  Was oxidation a problem from all of the pouring and refermenting?  Well, I found a bottle of this brew in the back of one of my beer refrigerators four years later, and, drum roll please… it was even better than I remembered with no telltale signs of cardboard, apple juice, sherry or any other descriptor commonly used to describe old oxidized beer.  [Side note: I also experimented— sorry, exBEERimented— by refermenting the beer with raspberry (pink) lemonade, but the limeade shandy was far superior.]

Will this trick work with all styles of beer?  Maybe, maybe not.

So here’s another idea.

Hopification:

You may have heard of Vinnie Cilurzo of Russian River Brewing Co. who’s credited with inventing the style of beer known as Double IPA.  True story: when Vinnie was brewing at the Blind Pig brewery prior to Russian River, he used to add copious amounts of hops to the brew in order to cover up possible off flavors that came from brewing with rather old brewing equipment.  And thus the Double IPA was born.

You can probably tell where this is going.

Yep, why not try hopifing your meh beer by laying down a dry-hop carpet bomb of your favorite hop combo.  Simply call your redo-brew a hopped up, or “West Coast”, version of a fill-in-the-blank beer and legions of hop-obsessed super fans suffering from alpha acid numb-tongue will thank you.

If you want to follow in the footsteps of Russian River’s Pliny the Elder dry hop schedule, try something like this (based on a 5 gallon net batch):

Measure out .25 ounces of Columbus, Centennial, and Simcoe for a total of .75 ounces, dry hop for 7-9 days, and then add a second round of the same amount and combination of hops for 5 more days.

Coffeefication:

Coffeefication is similar to hopification in that you’re simply adding some amount of coffee (beans, grounds, or cold pressed coffee) to your less than great beer.  Conveniently, you can add coffee to almost any style of beer, but usually less coffee is needed in lighter colored beers.  Dry hopping with coffee beans (ground or whole) or adding cold brewed coffee to the beer will work, although some brewers prefer dry hopping with coffee beans so as not to dilute the beer with already brewed coffee.

Not all coffee is the same, for example some coffee is more fruity, roasty, or chocolaty than others,  so choose a kind that you think will mesh well with your beer.

If dry hopping with coffee grounds or beans, figure 1-2 ounces per gallon of beer for darker beers, and .5-1 ounce for lighter beers for 48 hours (older beans work better to reduce the capsicum character).  These amounts are general guidelines as brewers have reported success adding a wide range of differing amounts of coffee beans/grounds to their beer, so fortunately you have a wide margin of error here. On a side note, adding coffee beans to beer often has little impact to the color.  This may add some extra wow-factor to a light colored coffee beer.

For adding cold pressed coffee to a darker beer, a ratio of 12-32 ounces of cold pressed coffee per gallon of beer is a good rule of thumb. Of course, when adding cold pressed coffee to beer, it’s best to pull a sample of your existing beer, and slowly add pre-measured amounts of coffee to the beer to better determine the ratio that best suits your taste for the particular style.

As always, no matter what style of beer you’re brewing, it’s best to rely on solid brewing practices like these so that you don’t need to resort to brewer’s magic.  Not to mention, even the most potent brewer’s magic may not be able to save you from the foulest of brewing abominations.

Nevertheless, the history of beer is replete with tales of happy accidents and certainly a little bit of brewer’s magic played a part in at least a few of the amazing beer styles available today.

So with that I say cheers to the underdog brewers who had the audacity not to dump and were handsomely rewarded with something truly sublime.

And cheers to those who tried anyways.


Like this blog?  Well, thanks- you’re far too kind.  

Tweet-worthy?  That would be very kind of you: 

Want to read more beer inspired thoughts?  Come back any time, friend us on Facebook, or follow us on Twitter:

Or feel free to drop me a line at: dan@beersyndicate.com

Hi, I’m Dan: Beer Editor for Beer Syndicate, Beer and Drinking Blogger, Gold Medal-Winning Homebrewer, Beer Reviewer, AHA Member, Beer Judge, Shameless Beer Promoter, and Beer Traveler.  Interests? Beer.

beer-syndicate-logo-72dpi-onwhite

How to Save a Bad Batch of Homebrew- Part 1

Sooner or later, every homebrewer brews a batch of beer that doesn’t quite live up to expectations.  Sometimes, a batch falls so far below the mark that a swirly sacrifice is rightfully demanded by the insatiable porcelain god.

Other times, the beer can be saved.  So let’s talk about those other times.  Those times when there’s still hope— when it’s still possible to bring your beer back from taking that final step into the light.

Let’s consider three cases in particular: infected beers, stuck fermentations, and meh beer, and then three corresponding solutions to each problem.

Fair warning: the better the beer you’re starting with, the greater the likelihood of successfully salvaging said beer.  As far as brewing a quality beer goes, there are plenty of best practices including using fresh ingredients (malt, hops, yeast, etc.), following careful sanitation, fermentation, and recipe procedures, and a few other recommendations you can find on the Top 40 Ways to Improve Your Homebrew article.

Yes, in every case where your beer doesn’t turn out as perfect as intended, it’s a good idea to go back through your process and figure out how to improve it.  But this article isn’t about woulda, shoulda, coulda nor are any of the solutions discussed here intended to be taken as a way around trying to brew the best beer possible from the very start.  The aim here is to talk about what can be done on those hopefully rare occasions where you find yourself with less than satisfactory homebrew.

The Infection Resurrection

Hang out long enough in any online brewing circle, and invariably an anxious brewer will post a photo of something growing on top of their beer inside a fermentor along with a question like “Is my beer infected?

For practical purposes, an infected beer simply means that some uninvited dinner guest (usually wild yeast and/or bacteria) has gotten into your beer and started to chow down, potentially altering the brew’s intended character.  To be clear, an “infected” beer is a matter of prospective.  For example, if you were intentionally using 100% bacteria to ferment your beer and somehow a common ale yeast found its way into your beer, your beer would be “infected” with common ale yeast; sort of the same way roses in one person’s garden may be considered weeds in someone else’s.

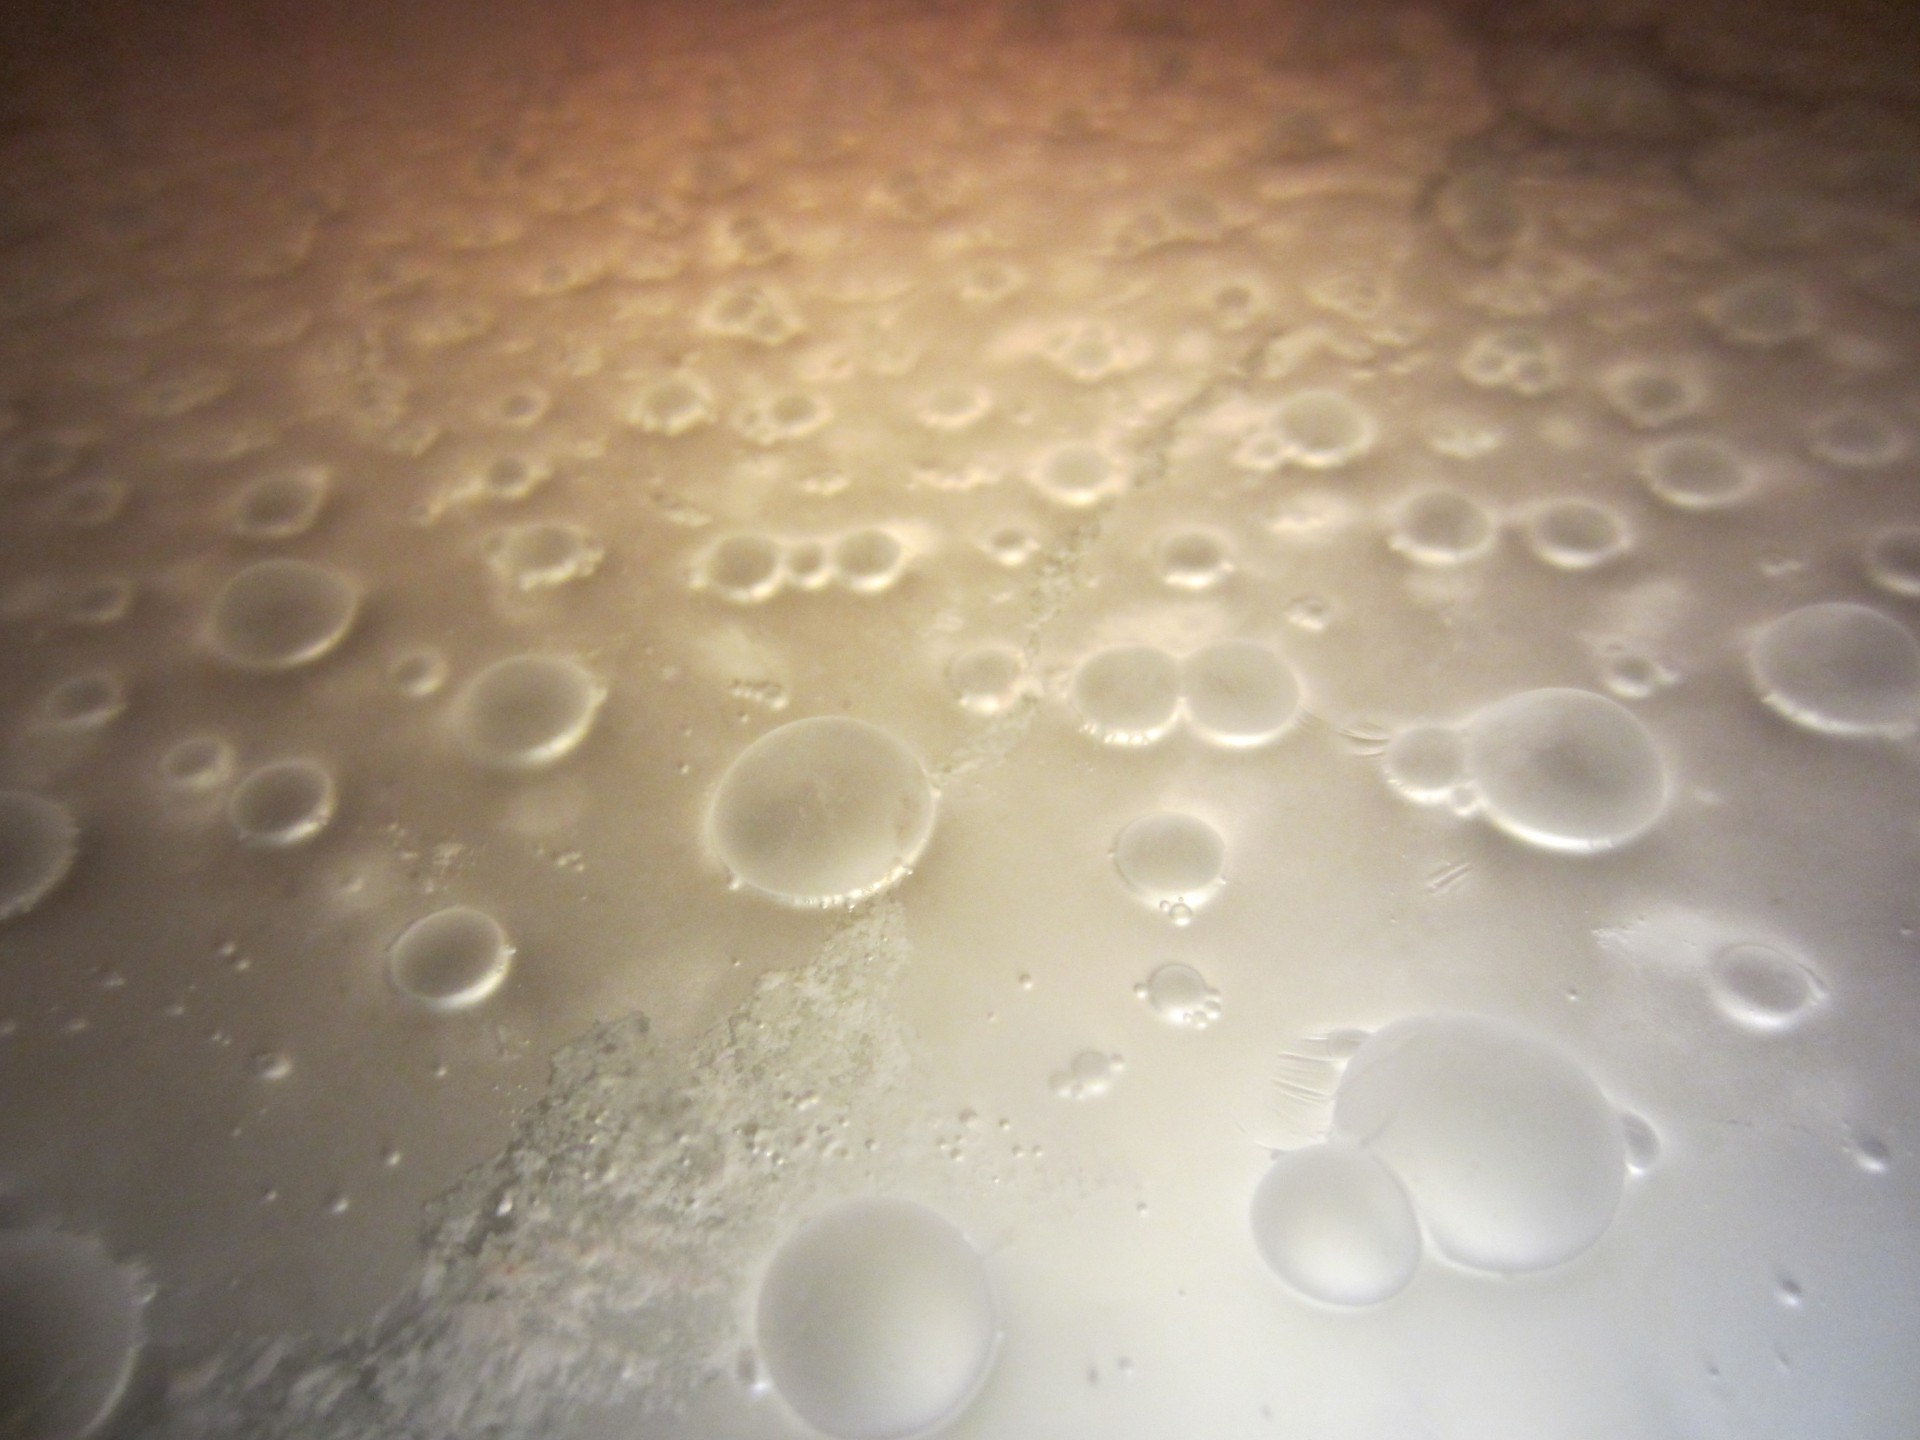
Semantics aside, sometimes it’s possible to make an educated guess as to whether a beer fermented with common brewer’s yeast (Saccharomyces cerevisiae or Saccharomyces pastorianus) is “infected” with some other unintentional microorganism by simply looking at the beer in question.  For instance, common souring bacteria like Lactobacillus or Pediococcus and sometimes yeast like Brettanomyces (Brett) can form a pellicle (protective barrier) on top of beer which often looks like a layer of off-white or tan stationary bubbles covered with chalk dust or powdered sugar as in the image below.

Lactobacillus Pellicle

Lactobacillus Pellicle

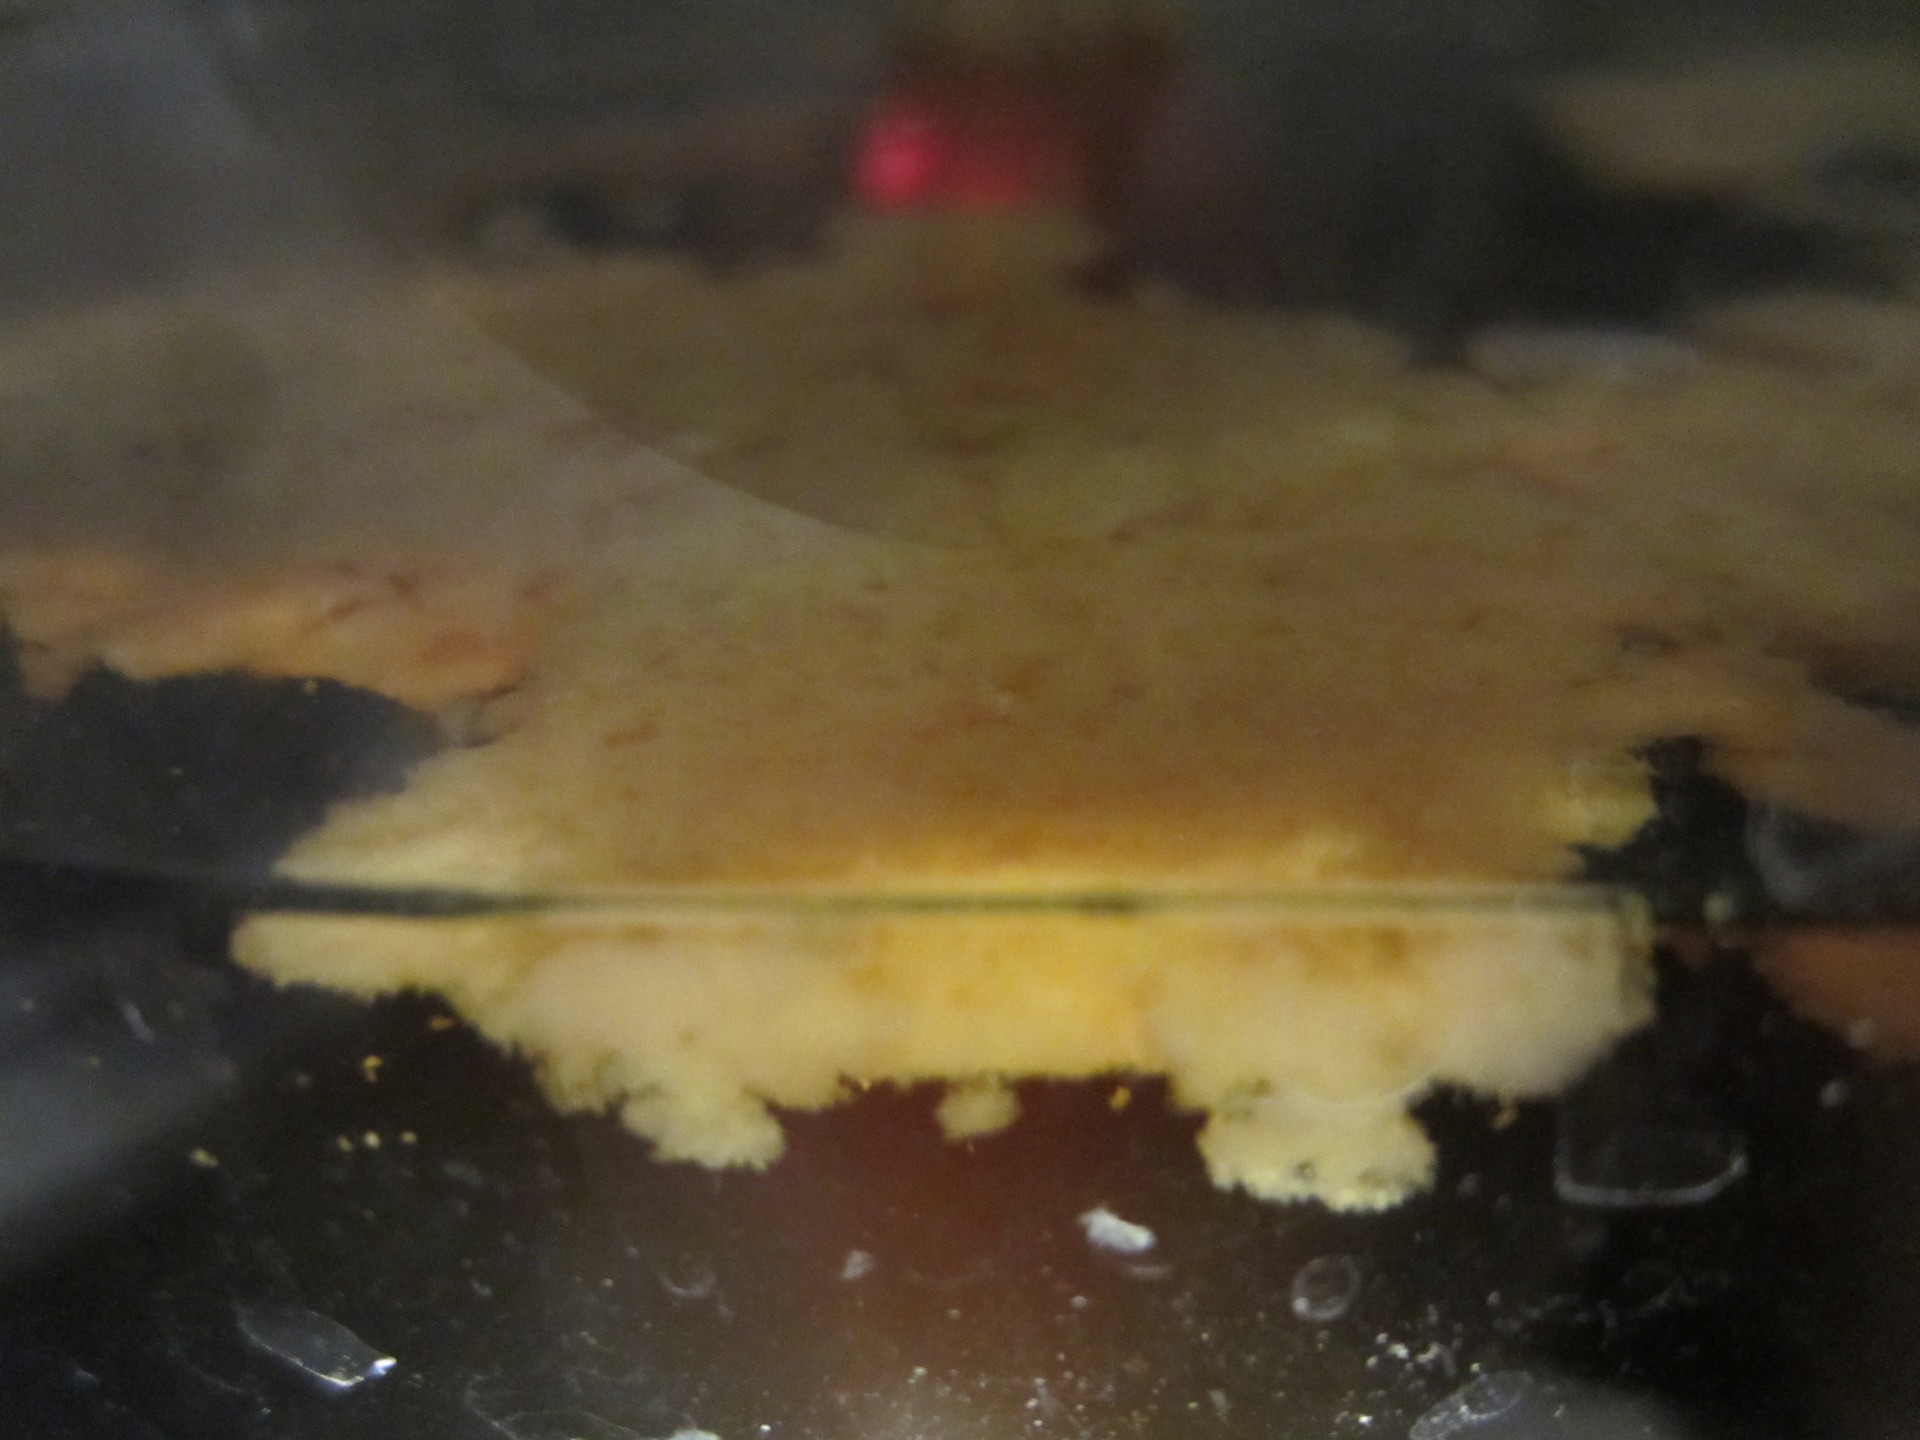
Other times, it’s harder to tell if a beer is infected based on appearance alone as with the picture below of an uninfected Imperial IPA fermented only with Safale US-05 (formerly called US-56) which formed “yeast rafts”, or clumps of flocculated yeast, floating throughout and on top of the beer in the fermentor.

Yeast Rafts

Safale US-05 Yeast Rafts

[While only aesthetically unappealing if present, yeast rafts can be settled to the bottom of the fermentor after about a week of cold crashing (i.e. lowering the temperature of the beer to near 32° F), and gently rocking the fermentor while cold.  Otherwise, the rafts can be skimmed or filtered out.]

Needless to say, an infection usually suggests that you need to tighten up your cleaning and sanitation procedures, being particularly mindful of anything that comes into contact with your wort.

With respect to bacteria-formed pellicles, the earlier an infection is caught, the better chance you may have of minimizing the effects of the infection by lowering the temperature of the beer.

But, and this is critical, EVEN IF you find a full-blown pellicle formed inside your fermentation vessel, it’s not recommended that you automatically dump your beer.  You have to smell and taste your beer first (pull a sample using a sanitized wine thief or turkey baster) in order to make the best decision.  Depending on the stowaway bacteria or wild yeast, your beer may or may not turn sour or funky.

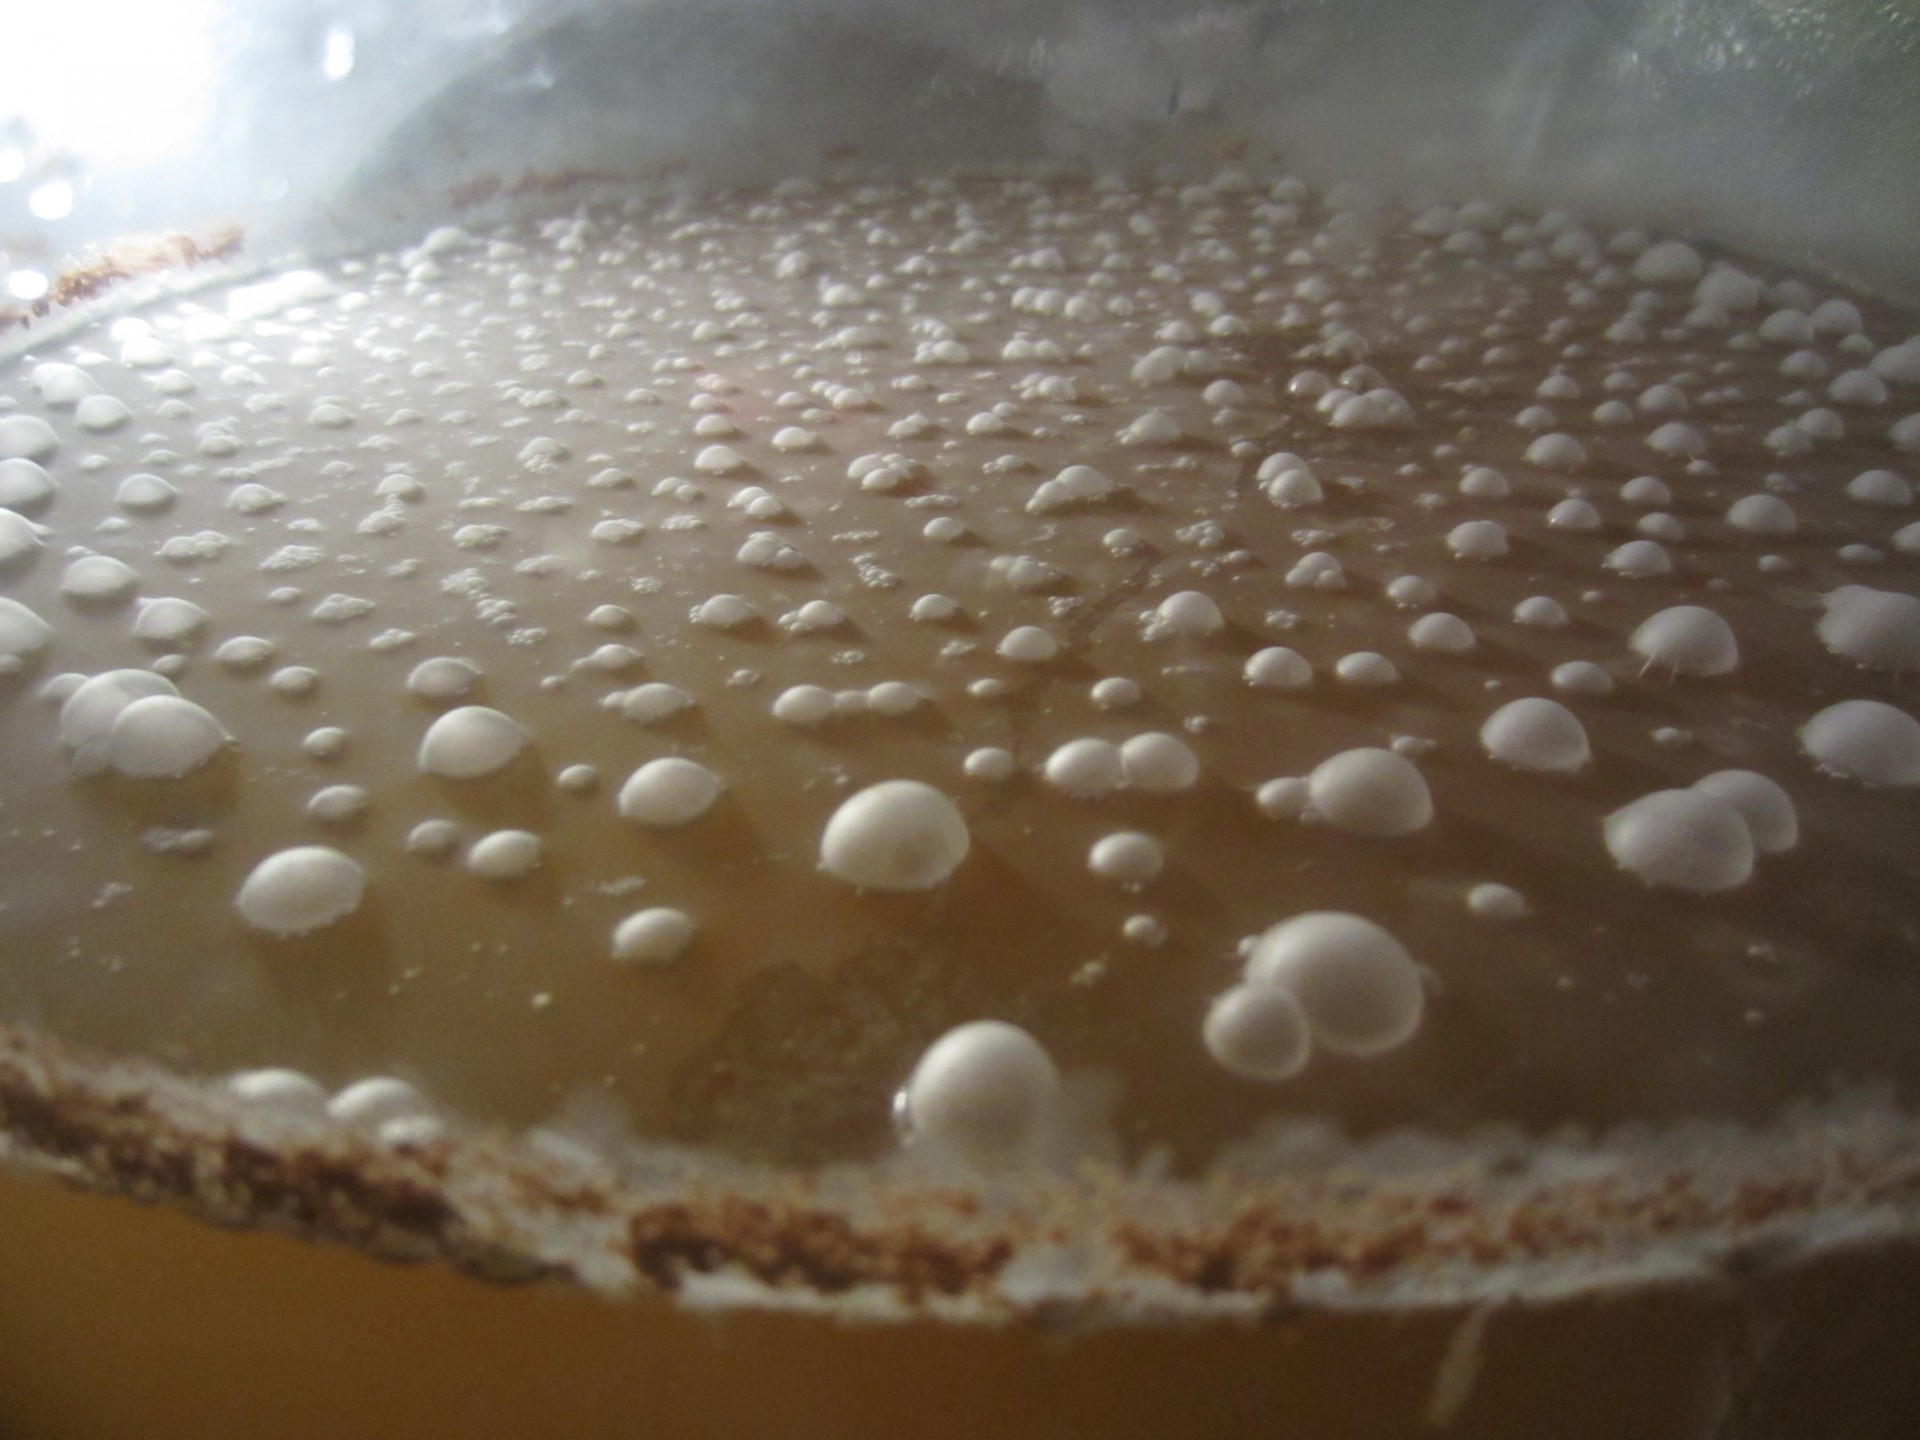
For example, the image of the Lactobacillus pellicle in the photo below occurred after pitching a mixed culture of yeast and the lactic acid producing souring bacteria, Lactobacillus.  Even after months of aging with a visible pellicle and then a year of bottle conditioning, the beer never really turned sour. In fact, it’d probably be an overstatement to say that the beer was vaguely tart, but it was nevertheless exceptionally refreshing and delicious with no hint of an off-flavor.

Lactobacillus Pellicle

Developing Lactobacillus Pellicle

Naturally, it may be helpful to attempt to deduce what type of pellicle-forming microorganism(s) you’re dealing with in order to respond accordingly, although 100% positive identification would require an appropriate microscope and proper training, assuming the microorganism(s) in question has already been identified and recognized by science.

Profiling Possible Invaders

Three common safe-to-consume pellicle-forming bacteria are Lactobacillus, Pediococcus, and Acetobacter, and the yeast Brettanomyces may form one as well.  Although it may not be possible to identify the mystery bacteria or yeast by the particular appearance of the pellicle, smelling and tasting the infected beer may potentially narrow things down, especially if you know a little bit about how the different microorganisms can behave.

Lactobacillus is probably the least influential of the bunch, often adding nothing more than mildly tart amounts of lactic acid over the course of about a month.  Pediococcus, on the other hand, typically takes a longer time to ramp up lactic acid production compared to Lactobacillus (months versus weeks), but produces lactic acid over a longer time period and the sourness is often increasingly more noticeable than with Lactobacillus.

But even more telltale of Pediococcus is the buttery byproducts (diacetyl) that most strains produce.   If you like your new buttermilk beer, roll with it.  But if you’d like to remove the butter and leave the sour, try inoculating your brew with a vial of Brettanomyces (Brett) yeast which should clean up the diacetyl for you.  In addition, some strains of Pediococcus may eventually develop slimy, viscous, gelatinous “ropy” strands in beer, which can also be eliminated in a few weeks after adding a culture of Brett.

Speaking of Brett, if you see a pellicle, you may be able to further speculate on the presence of Brettanomyces based on the aroma.  Depending on the strain of Brett, and there are quite a few, you might detect aromas of pineapple, mango, apricot, peaches, pear, mustiness, or horsiness and the taste may be tart or not.  Although with significant quantities of oxygen, Brett can produce acetic acid as well, but not as easily and quickly as Acetobacter.

Acetobacter is probably the most potent souring bacteria which can form a thin white film of a pellicle (few if any bubbles), but is easier to identify by its distinctive vinegar (acetic acid) aroma which can develop within a week, usually after primary fermentation is complete.   Acetobacter thrives in warmer temperatures (75 – 85° F) and in oxygen-rich environments.  Early detection is the best defense against Acetobacter which if left unchecked will continue to convert ethanol into acetic acid, potentially leaving you with an intensely vinegar-y beer. Luckily, the majority of beer styles are fermented below 75° F, but reducing the temperature and ensuring that your fermentor is properly sealed are two actions that can reduce the effects of Acetobacter.

It should also be noted that bacteria and Brett do not always form a pellicle (they only do so in the presence of oxygen), which means your beer could develop an infection with no visual indicator.

To be clear, the presence of a pellicle does not mean that your beer will make you sick, nor does it mean that the character of your beer will have changed for the worse.  And as discussed, depending on the pellicle-forming microorganism in question, the beer may not even become tart, let alone sour.  Lastly, if you notice an unexpected pellicle, there may be more than one type of bacteria and/or Brett at work.

Hold ‘em Or Fold ‘em

If you’re uncertain about the type of bacteria (or yeast) forming the pellicle on your beer and you happen to be an adventurous sour fan, why not double down and add a culture of a pre-mixed bug blend like WLP 665 or dregs from one of your favorite unpasteurized sour beers to your existing beer, wait three months to a year and you might have created a most epic accidental sour.  If this is your first sour, just remember that unlike a yeast krausen, a pellicle may never fall, so when you’re ready to rack your beer away from an existing pellicle, simply pierce the pellicle with your auto-siphon and proceed as normal (just try to leave the pellicle behind when racking underneath it).

If you decide to let the infection run its course, keep in mind that bacteria like Lactobacillus and Pediococcus may consume sugars and reduce the gravity of the beer slowly over time (weeks and months, respectively), so you’ll want to take gravity readings until you notice no change in gravity after a three day period (five days to be safer), particularly if you’re bottling (in order to avoid potential bottle bombs).

If you don’t want to find out where the unknown bacteria or yeast in your beer may be taking you, smell and taste your beer, and if it tastes good enough, you may decide to keg or bottle the beer and drink it immediately.   If bottling before the bacteria or wild yeast has finished fermenting your beer, the microorganisms may very well still be producing excess CO2 in your bottles and you are taking the risk of potential bottle bombs.  So to mitigate that risk, as soon as your bottled beer is carbonated to your liking, refrigerate the beer and keep it cold as bacteria and yeast tend to slow the rate of metabolism at lower temperatures.

Whether you decide to drink the infected beer quickly or let it age in the fermentor, it’s recommended that you buy a new set of whatever plastic and vinyl equipment that comes in contact with the infected beer so as to avoid accidentally contaminating future batches of beer.

Mold and Beer

If you notice black, green, or fuzzy hairy patches growing on your beer, mold is the likely suspect.  A couple cases where mold has been known to crash the party are when unsanitized fruit or wood is added to the fermentor.

Now, what to do in the case of mold is somewhat controversial.  John Palmer advised in his book How to Brew, that if you encounter mold, take a sample of the beer, and if it doesn’t taste foul, you can skim the mold off [or rack the beer out] with no lasting effect on the beer’s flavor and infections in beer caused by mold are not dangerous.

However, the USDA points out that while some molds are beneficial, there are types of mold that cause allergic reactions, respiratory problems and produce poisonous mycotoxins that can make you sick.  One such mycotoxin called “aflatoxin” is produced by some species of Aspergillus mold (A. fumigatus and A. flavus), and can be found on grain and groundnuts; aflatoxin is both carcinogenic and can be a deadly toxin in high enough exposure levels.

Scientific research on the ability of foodborne pathogens to survive in beer is scarce.  While one study [2014] showed that certain common bacterial pathogens could survive in fermented beer for up to several weeks, no mold (fungal) pathogens were tested.  Another study [2011] demonstrated poor survival of common bacterial pathogens in moderately hopped wort, with a final ethanol concentration of 5 % ABV, and concluded that if the pathogens tested* were to contaminate such a wort, “there would be no immediate concern to public health.” [* Tested pathogens: Escherichia coli O157:H7, Salmonella Typhimurium, Listeria monocytogenes, and Staphylococcus aureus.]

Again, no molds were tested in either case, so until there are more (or any) scientific studies concerning the growth and survival of pathogenic mold species in beer, proceed at your own risk when it comes to mold.

One final note to keep in mind about infected beer is that it may not turn out as you originally planned prior to the infection, and you may not personally like the end result or want to tie up your brewing equipment while the beer develops.  That said, an infection doesn’t mean the beer is unsafe to drink nor does it mean the beer can’t be saved.  If you have the time and patience (and a penchant for sours, depending on your particular infection), you may be pleasantly surprised with the final product.

Cheers!

P.S. Join us next time where we’ll wrap up the discussion of how to save a bad batch of homebrew with tips on how to bounce back from a stuck fermentation and how to transform meh beer into a meh-raculous brew.

[As fate would have it, “next time” is already here. Read part two of this article, How to Save a Bad Batch of Homebrew- Part 2]


Like this blog?  Well, thanks- you’re far too kind.

Tweet-worthy?  That would be very kind of you

Want to read more beer inspired thoughts?  Come back any time, friend us on Facebook, or follow us on Twitter:

Or feel free to drop me a line at: dan@beersyndicate.com

Hi, I’m Dan: Beer Editor for Beer Syndicate, Beer and Drinking Blogger, Gold Medal-Winning Homebrewer, Beer Reviewer, AHA Member, Beer Judge, Shameless Beer Promoter, and Beer Traveler.  Interests? Beer.
Daniel J. Leonard and Jean Van Roy

Dan with Jean Van Roy of Cantillon Brewery

Powered by WordPress & Theme by Anders Norén