When it comes to homebrewing, some people like the bottling process. Others would rather read the latest proposed changes to income tax law. I fall into camp number two. And I don’t keg.
Assuming you don’t have the extra money, interest, space, or time to set up a kegging rig, or if you simply want to improve the efficiency of your current bottling procedure, this guide’s for you.
Not to mention, if you only keg but also enter homebrew competitions, anecdotal evidence of side-by-side taste tests suggests that people prefer the taste of bottle conditioned beer over the same kegged beer. Try it and see for yourself.
This guide also assumes that you have at least minimal experience with bottling beer, or are generally familiar with the process and the basic equipment required. If not, here’s a guide to bottling 101.
And with that, let’s take a look at some best practices for preparing bottles for glorious bottling day.
1. A Rinse in Time Saves Nine
It can be cost-effective and environmentally-friendly to save the empty bottles of store-bought beer for future homebrewing purposes. Once the beer bottle is empty, it’s good to get into the habit of giving the inside of the bottle a quick rinse with water right away to prevent crusty gunk from building up in the bottle.
This will save you from having to aggressively scrub the inside of the empty bottle with a bottling brush once bottling day comes. You can usually identify the bottles that you remembered to pre-rinse versus those that you didn’t by holding the mouth of the bottle up to your eye like a telescope, and then directing the bottle towards a light source. The bottles that haven’t been pre-rinsed often have hairy fungus or bacteria growing inside the bottle, which is usually the last thing you want your future beer to come in contact with. Yum.
2. De-Labeling Made Easy
Speaking of re-using the empty bottles of store-bought beer for future homebrewing purposes… Although it’s not necessary to remove the commercial labels from empty beer bottles to make great beer, there are at least six reasons some people do it: (1) When cleaning bottles that still have labels on them, there’s a chance that little pieces of the label can fall off and make their way into the bottle itself (or clog up your dishwasher, if you clean bottles that way), (2) removing labels makes it easier to add your own personalized labels to the bottle if you were so inclined, (3) some people like collecting the commercial labels for various projects, (4) leaving the commercial label on can confuse or subconsciously (negatively) influence people that you’re gifting your homebrew to, (5) some people might perceive leaving the original label on a bottle of homebrew as lazy, tacky, or otherwise showing a lack of pride in your craft, and (6) many homebrew competitions require that labels be completely removed from the bottle.
Assuming any combination of the above applies to you, let’s look at a few easy tricks to get labels off.
Soak, Scrape, Scrubbie, and sometimes Vegetable Oil
Ideally, you would have removed the beer labels prior to bottling day, but either way, simply soak them in warm or hot water for about 30-60 minutes. This can be done in a clean sink, or better yet a clean plastic bin. Some people like to add a bit of soap, Star San, One Step/Oxyclean or some other similar cleaning product into the soaking water, but really water and time are all you need. Not to mention, using One Step/Oxyclean may leave a milky white film on your bottles, which can be removed by soaking the bottles in a diluted vinegar mixture, but why not avoid the extra work, and simply stick with warm/hot water bath.

That being said, leaving bottles soaking in a plastic bin filled with water in excess of a week may leave your bottles smelling a bit funky, and possibly promote the growth of some interesting fungal creatures.
While some labels will fall right off after soaking in water, others will require a little extra persuasion. Your best bet is to buy a glass scraper (basically a retractable razor blade with a handle), and use it to scrape the less cooperative labels off.
After the labels are off, the remaining glue will usually come right off with the aid of a brewer’s best friend, a little green scrubbie (see image below).

For those tough cases involving exceptionally sticky glue (usually found on bottles that have transparent plastic labels), you have two choices: (1) toss the bottle, or (2) you can apply some vegetable oil to a paper towel and then rub the paper towel on the glue on the bottle. The glue will loosen so that it can be more easily scrapped off with a scrapper. If necessary, apply more vegetable oil and continue to scrape the glue off the bottle until the glue is removed. Once the glue is off, wipe off the excess oil on the bottle with a clean paper towel. I’d only recommend this extra step for bottles you are dead set upon keeping, otherwise, it’s probably not worth the effort.

While some people like using chemical products like Goo Gone to remove tough label glue, vegetable oil is arguably the more food-safe option.
3. The Wallpaper Tray Cleaning Method

When it comes to cleaning the inside of bottles, one of the cheapest and most useful pieces of brewing equipment a bottling homebrewer can have on hand (in addition to a bottle brush) is a plastic wallpaper tray. You can often purchase one from your local home improvement store (Lowe’s sells them for about $3). Once acquired, pre-rinse the inside and outside of your bottles with water. Mix up a one-gallon batch of One-Step, Star San, or your favorite cleanser/sanitizer, and then pour it into the plastic wallpaper tray until the tray is about ¾ full.
Lay four 12 oz bottles down into the wallpaper tray to soak, all facing the same direction. Once you’ve scrubbed the inside of one bottle with a bottling brush, face the bottle in the opposite direction so you know it’s already scrubbed. Remember, Star San is tougher on your hands than One Step, so when using Star San when sanitizing and scrubbing either limit direct contact to your hands to about 30-45 minutes or consider wearing plastic or vinyl gloves.
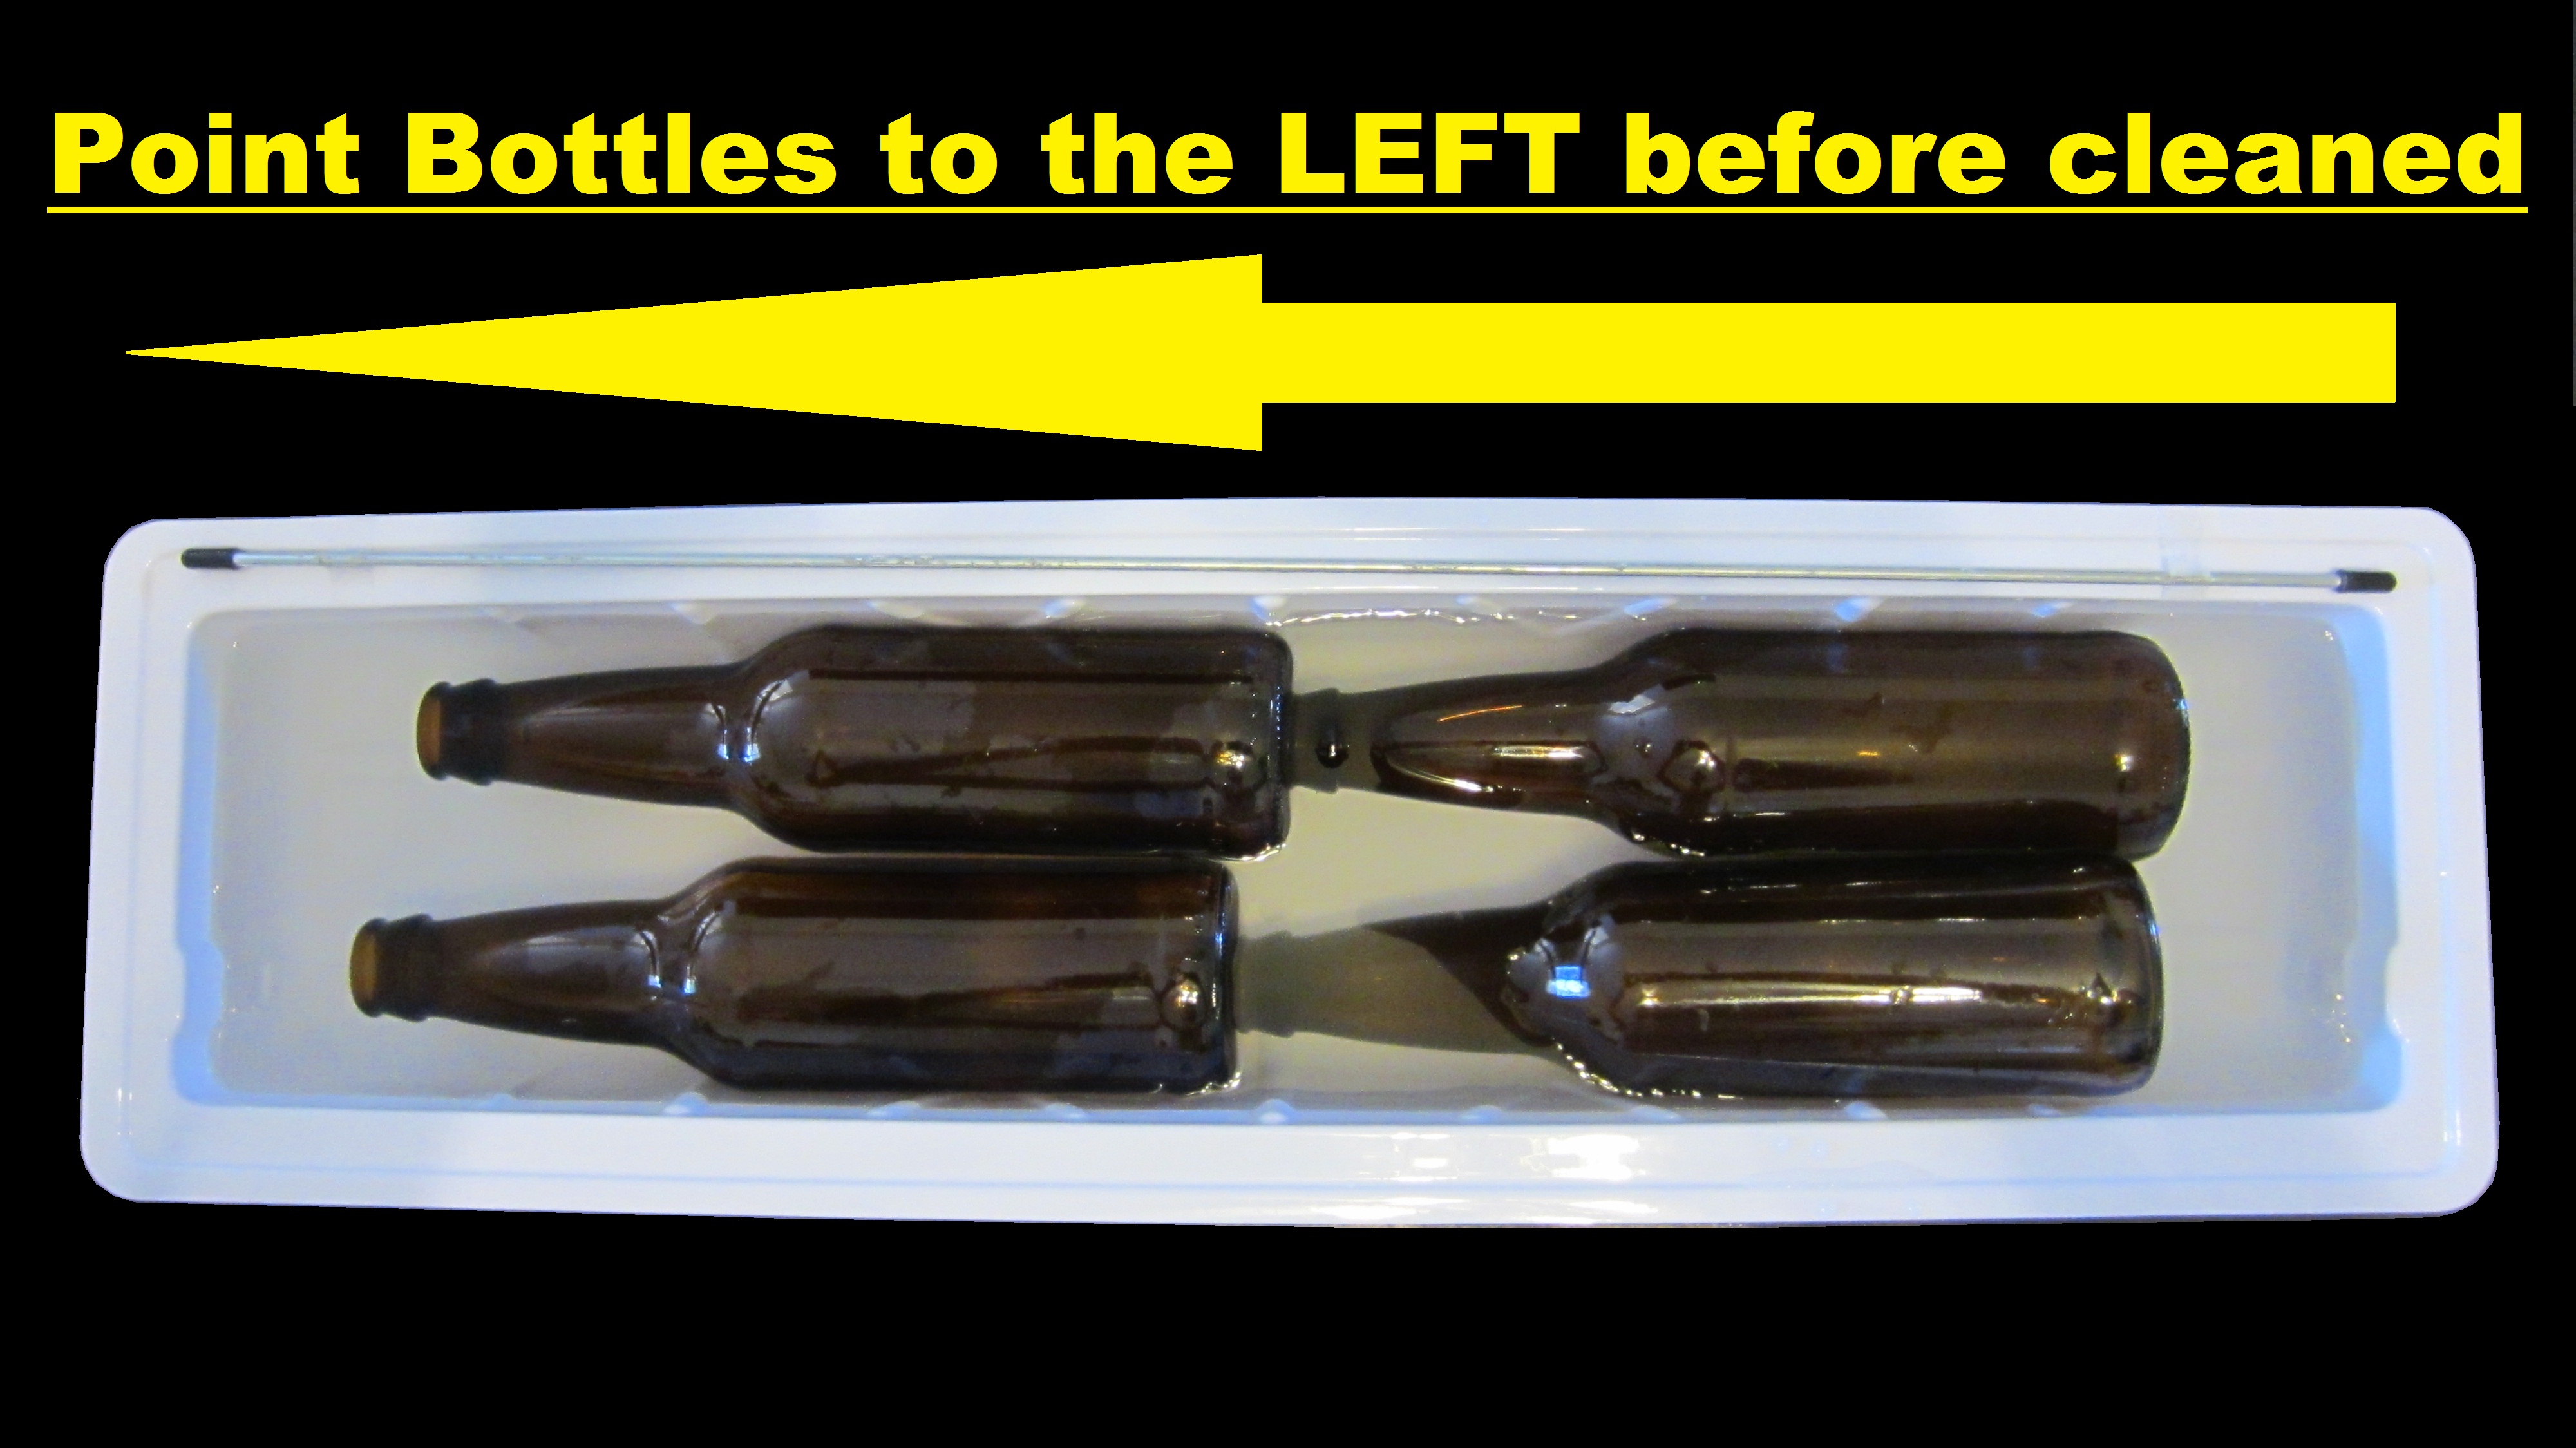
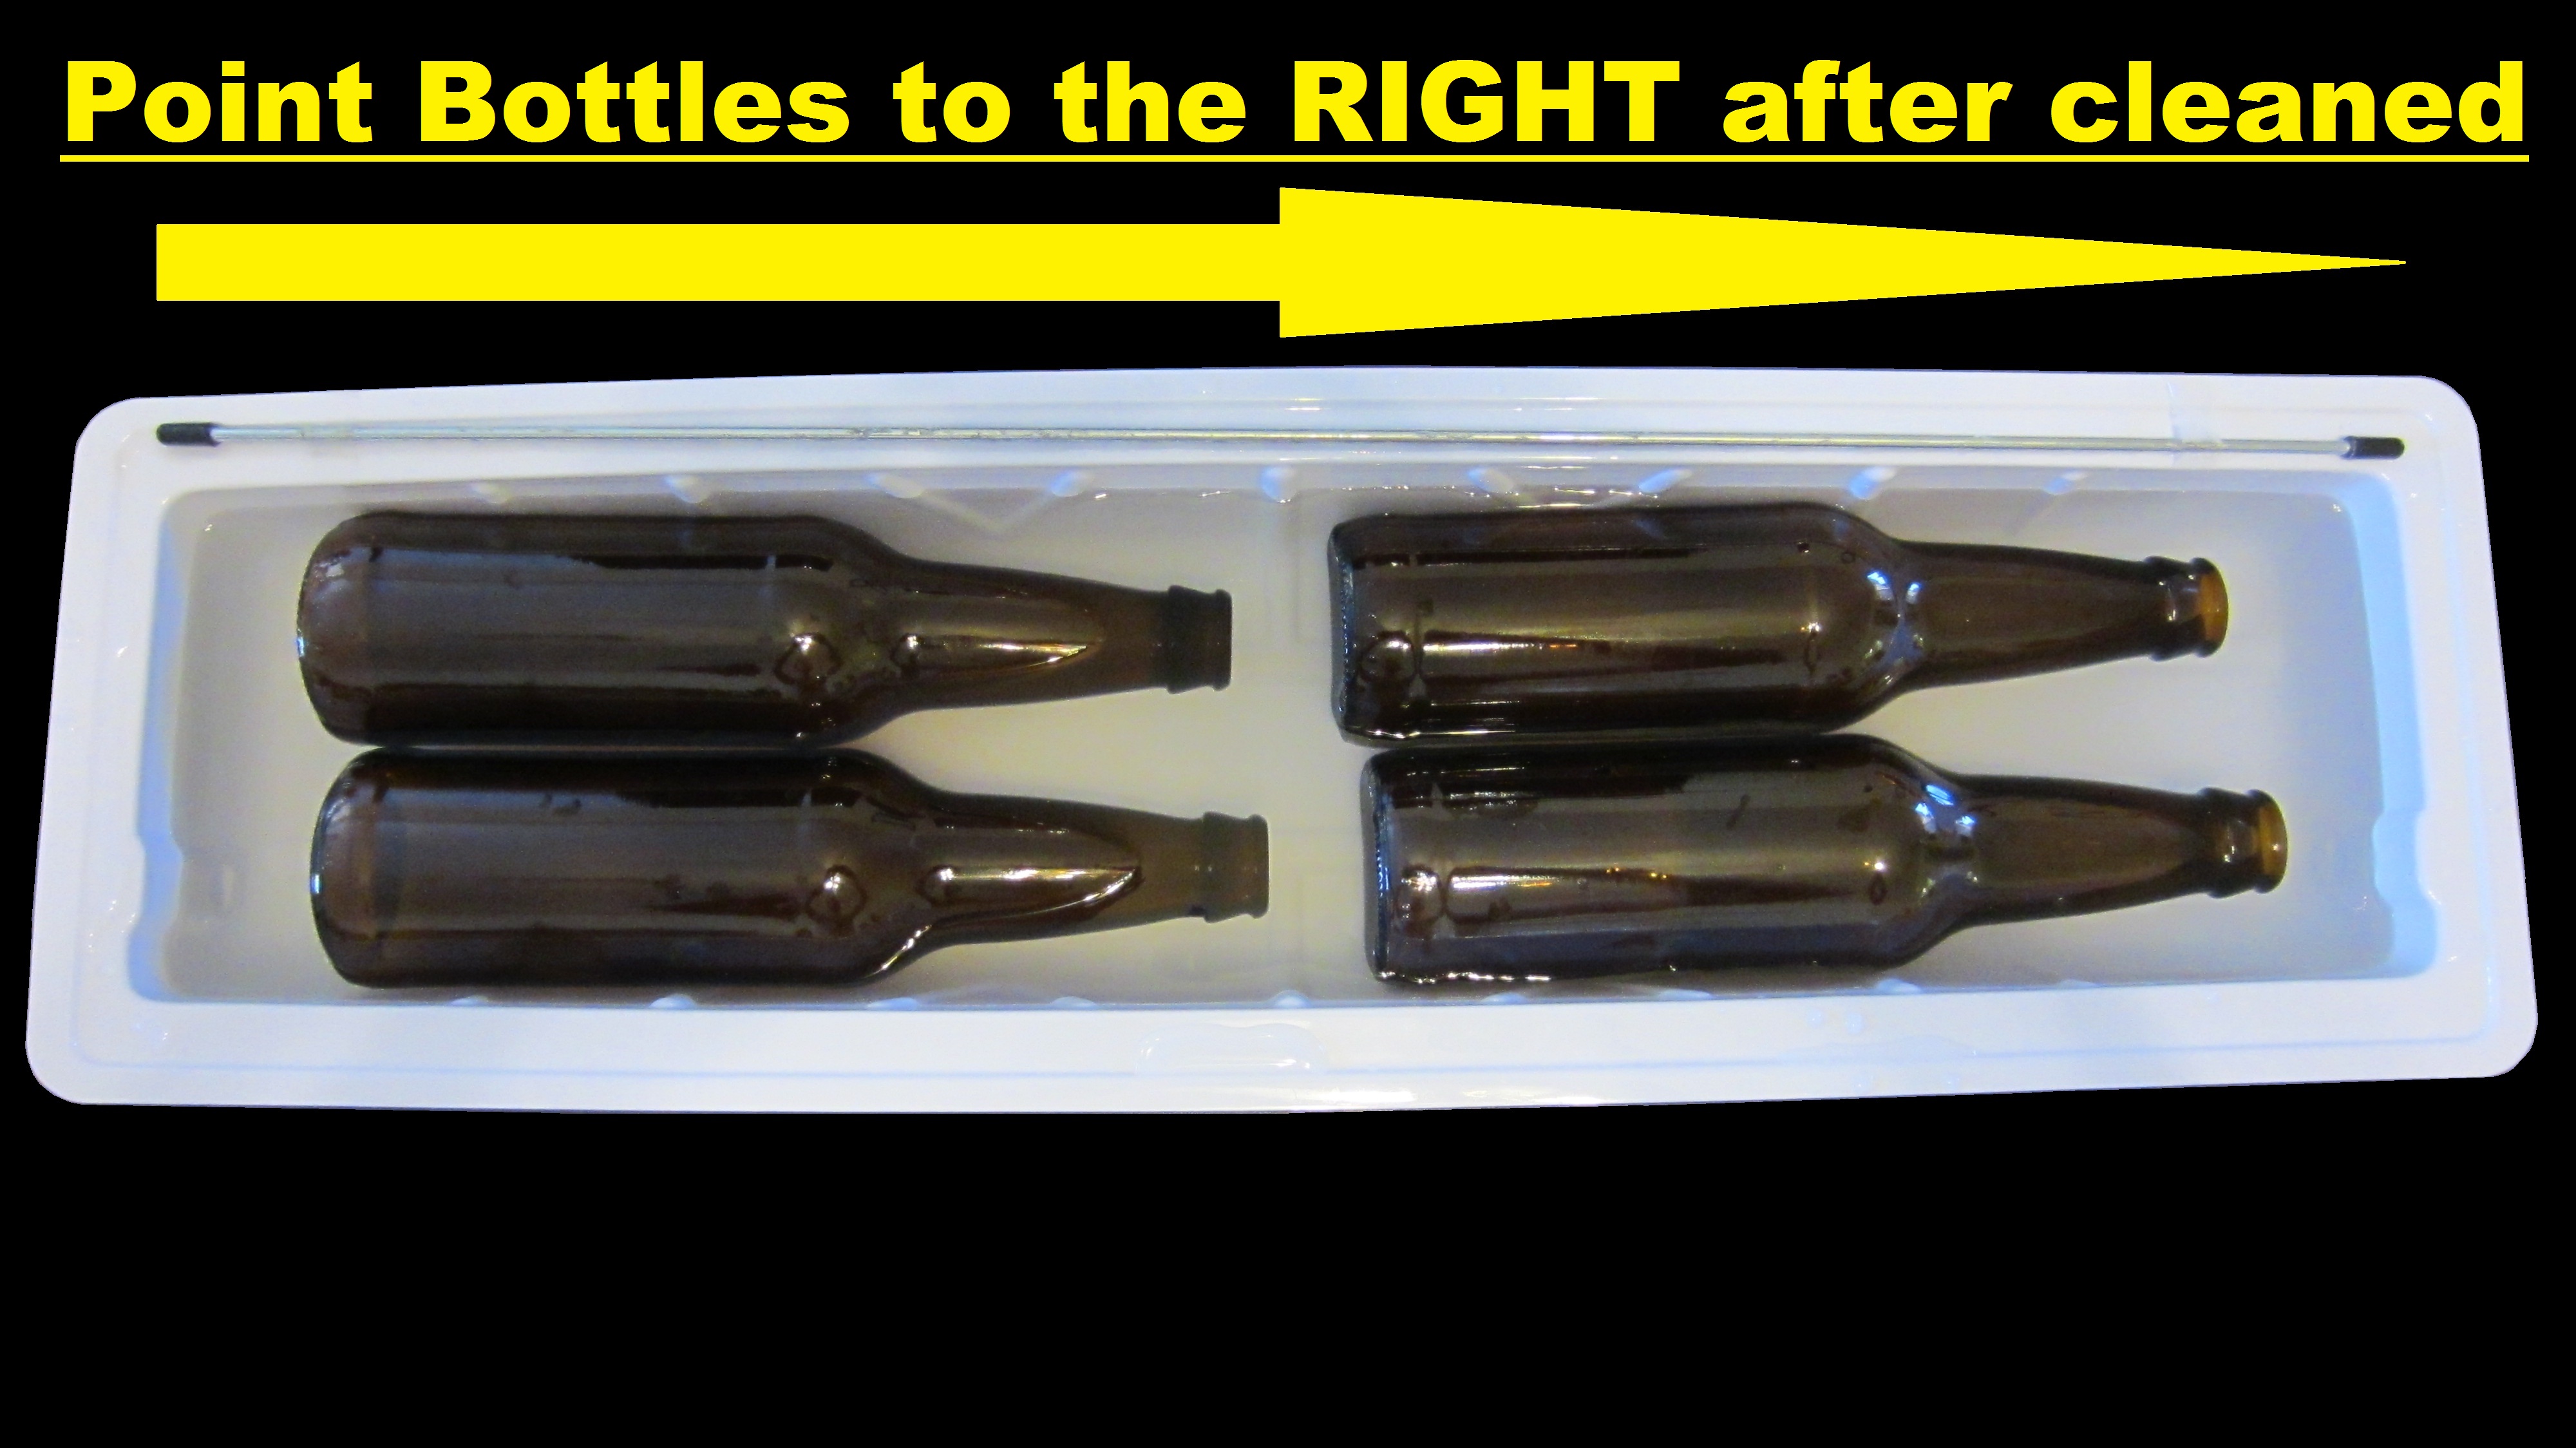
Some homebrewers use a vinator, which is a plastic tool used to spray cleanser/sanitizer into the bottle. There are at least three disadvantages with the vinator: (1) it costs roughly $20 whereas a wallpaper tray costs about $3, but more important than the cost benefit, (2) you can only clean/sanitize one bottle at a time instead of four with the wallpaper tray, and (3) with a wallpaper tray your bottles stay more thoroughly in contact for a longer time with the cleaning/sanitizing solution.
4. The Dishwasher Option
First things first, a dish washer isn’t necessary to adequately clean and sanitize bottles, but it can help make your life A LOT easier. Even so, it’s not recommended that you rely solely on your dishwasher to clean your bottles for at least two reasons: (1) the dishwasher won’t scrub the inside of your bottles, and (2) using dishwasher soap can reduce the head retention of your beer and potentially cause your bottles to take on a dishwasher soap character.
That said, using a dishwasher gives you a few potential benefits when bottling:
A) Makeshift Bottling Tree and Bottling Station: If you’ve already cleaned/sanitized your bottles, you don’t necessarily need to run the bottles through a dishwasher cycle. You can instead use a clean dishwasher as a makeshift bottling tree and bottling station. Once your bottles are sufficiently clean, simply place them upside down in your dishwasher (after a clean cycle). And, presto: instant bottling tree which prevents dust or other debris from falling into the inverted bottles.
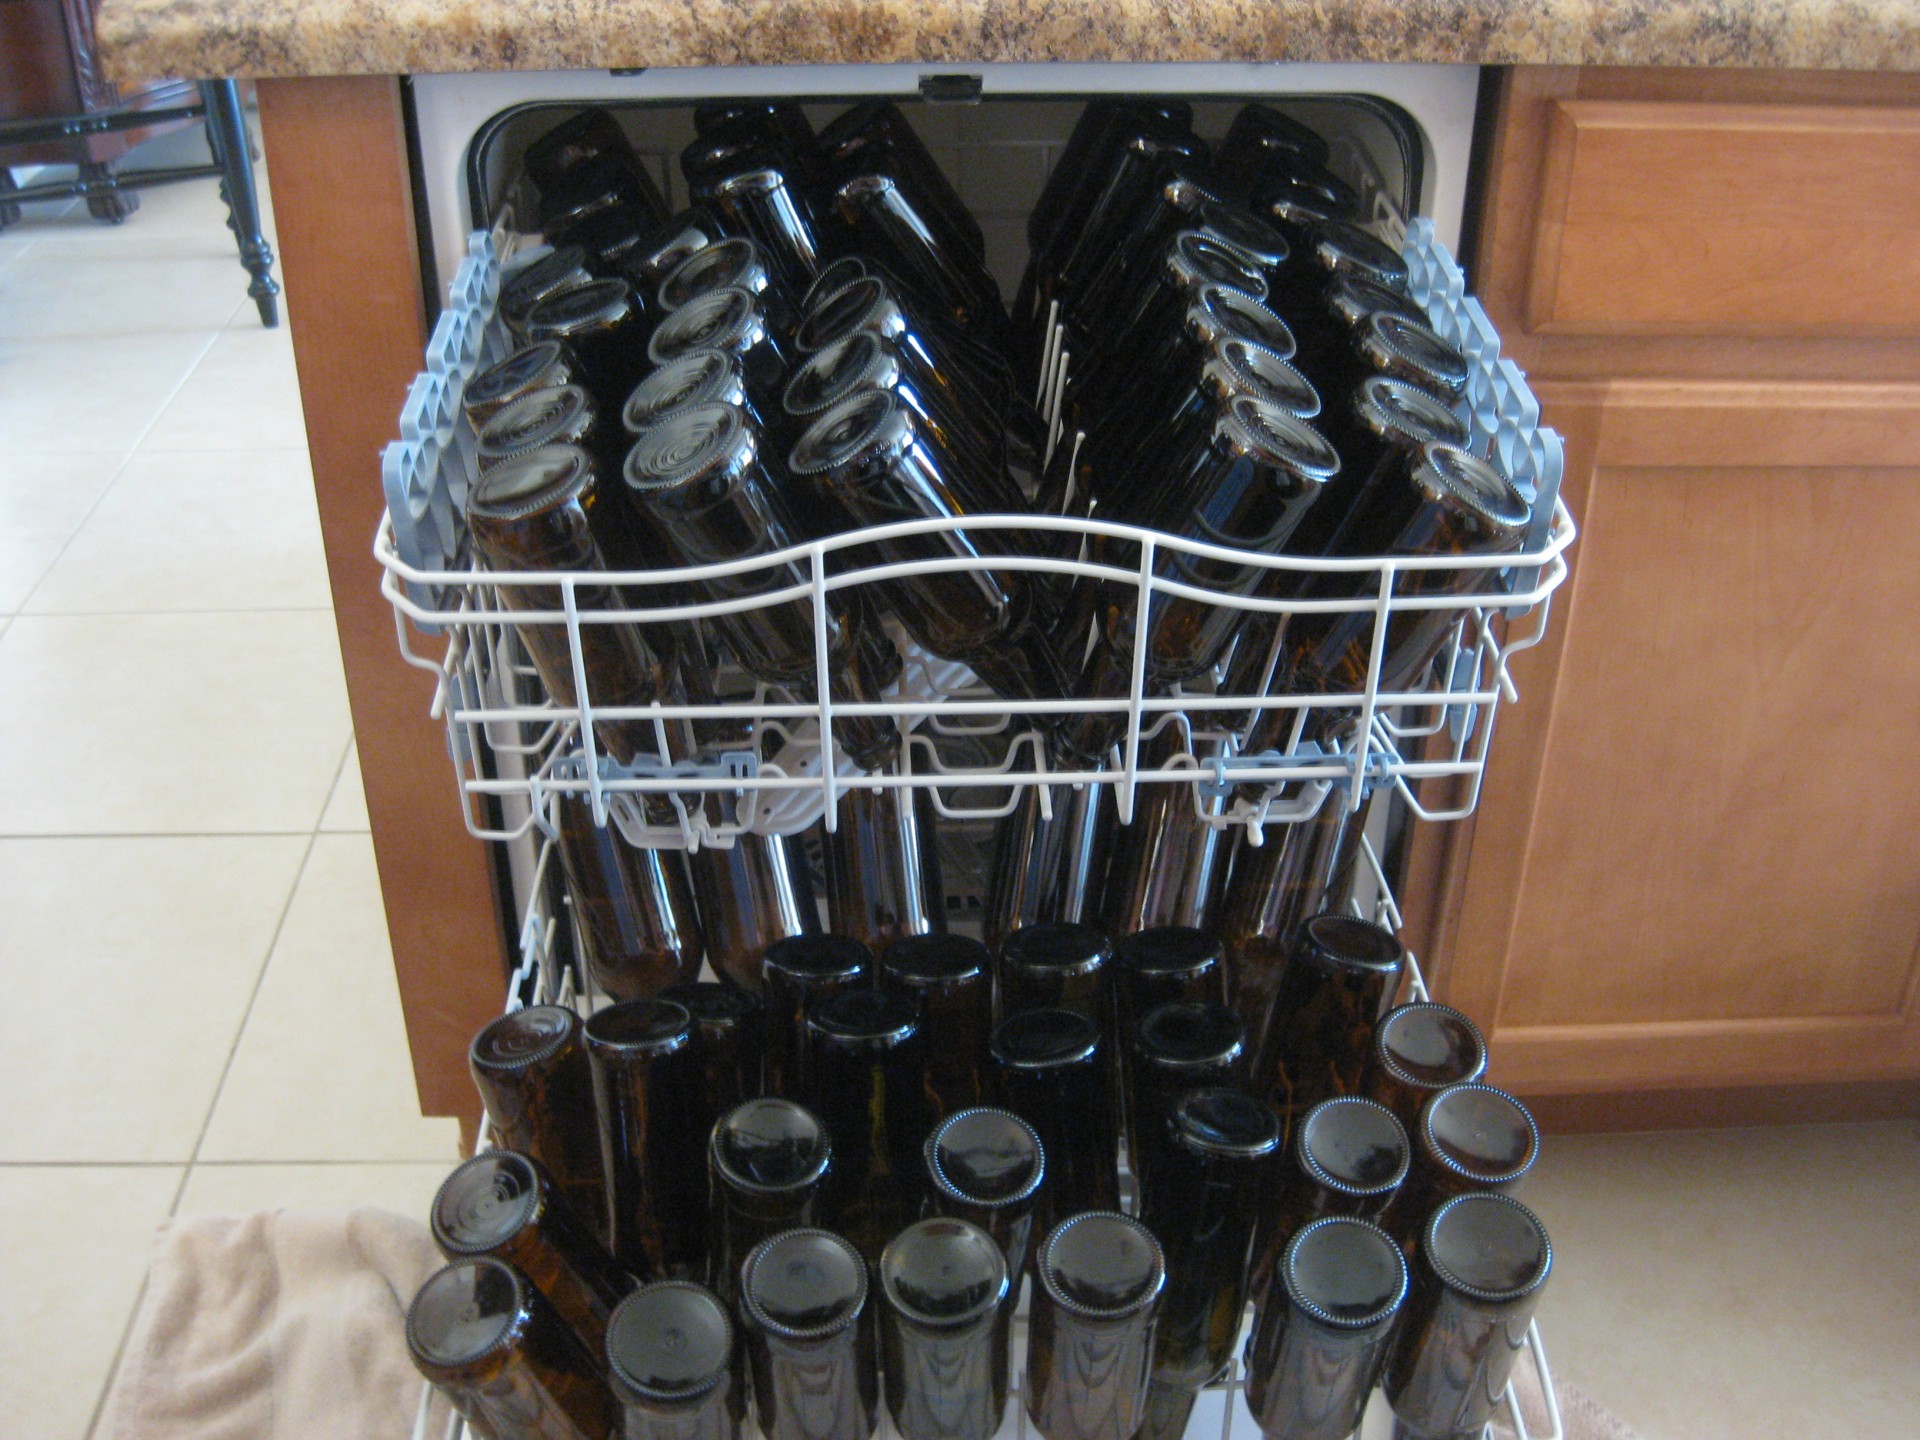
Not only that, the dishwasher doubles as an ideal bottling station: Simply pull the door of the dishwasher open and bottle right on it so that if you spill, the sticky beer spills on the inside of the plastic dishwasher door instead of your counter tops or floors.
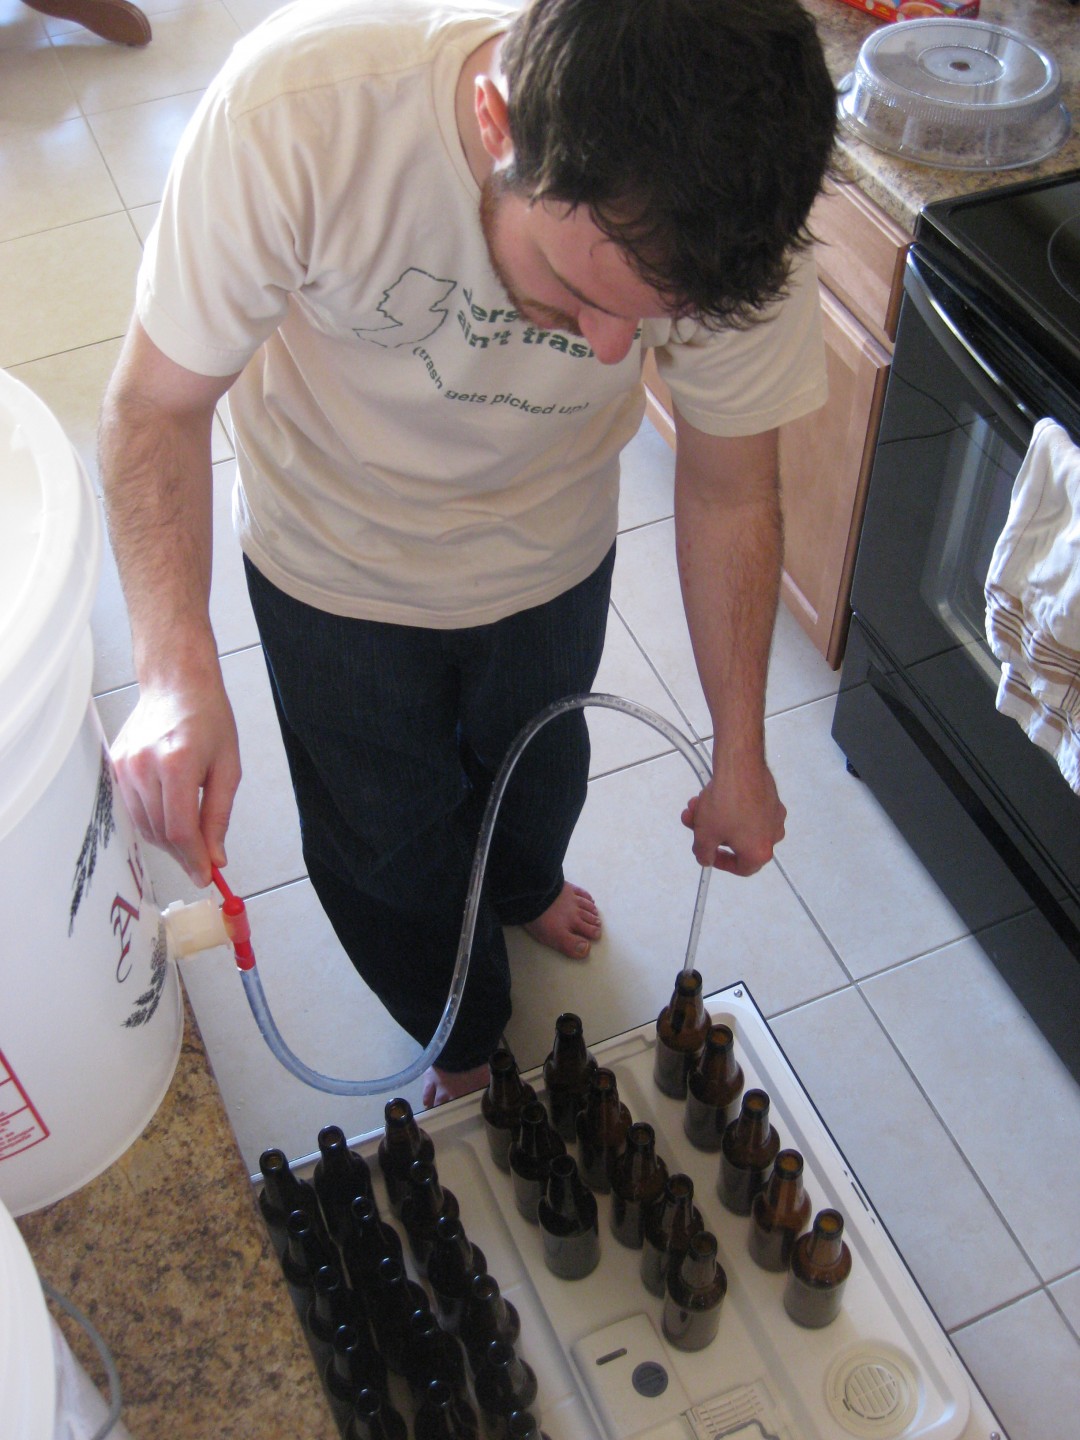
B) OCD-Clean Bottles: If you’re the type of person who really likes to go the extra mile to ensure your bottles are as sanitary as possible to avoid any potential bottle- borne infections, you can place your already rinsed/sanitized bottles upside down in the dishwasher, and run them through a no-detergent heat cycle in order to better sanitize the bottles with heat. Again, using a dishwasher doesn’t replace the step of scrubbing the inside of the bottles with a bottling brush because the water from the dishwasher mainly will cover the outside of the bottles, and won’t thoroughly get inside the bottles to clean out any bacteria or mold spore deposits.
5. The Procrastination Tactic
If you’ve already cleaned/sanitized your bottles and don’t want to or can’t bottle right away (especially if you’ve run the bottles through the dishwasher and don’t want to tie up the dishwasher any longer), simply place your cleaned bottles in a box, cover the mouths of the bottles with plastic wrap, and your bottles will stay clean and be waiting for you when you’re ready.

6. Don’t Be Cheap. Buy a Bottling Bucket, Auto-Siphon, and Bottling Wand
Can you bottle beer without a bottling bucket, auto-siphon and bottling wand? Yes. Does this equipment make your life easier on one of the less fun days of the brewing process? You betcha. Here’s the thing: You can use a standard fermentation bucket or carboy and transfer the beer into bottles with some tubing and a funnel, but you are asking for trouble in the form of potentially infecting your beer (assuming you started the siphon with your mouth) and exposing your beer to unnecessary oxidation which can cause your beer to stale sooner and produce papery, wet cardboard (trans-2-nonenal), sweet apple cider notes (2,3-pentanedione), or sherry-like components (benzaldehyde ). The use of a bottling wand not only helps to reduce oxidation, but also allows you to better control the flow and amount of beer going into each bottle.
7. Avoiding the Trouble with Trubbies
Speaking of not being cheap, don’t be greedy either when it comes to siphoning your beer into your bottling bucket. In other words, while it may be tempting to siphon up every last drop of beer from your fermentation vessel, you also risk sucking up a fair amount of sediment (trub) as well, which will likely find its way into your bottles, and then often into your drinking glass. Not only is excess trub in a beer visually unappealing, it can also contribute to an overly yeasty character in your beer the longer the beer stays in contact with the trub in the bottle.
To further manage the trouble with trubbies on bottling day, after you’ve moved your fermentation vessel to wherever you’ll be bottling (ideally a counter top over the dishwasher), allow the disturbed trub in the vessel to settle back down to the bottom of the vessel again for about 30 minutes before siphoning.
8. For the Love of Carbonation… Make Use of a Priming Sugar Calculator and a Digital Scale
Most people know the importance of a properly carbonated beer, but not all brewers do it well. Each style of beer has its ideal carbonation level and the best way to achieve that perfect carbonation is by using a free online priming sugar calculator to determine the exact amount of sugar to add when bottle conditioning. Simply input the volume of beer you wish to carbonate, the type of sugar being used, the highest temperature the beer reached post fermentation, and your desired level of carbonation level (most calculators provide recommended carbonation levels depending on the beer style). I like using TastyBrew’s priming sugar calculator because it’s simple, but there are other good ones out there too.
Once you know how much sugar to prime with, use a digital scale to weigh out the correct amount, and it’s easy to switch between ounces and grams especially when you need the kind of accuracy that working in grams provides. A good scale will run about $20 at most big box stores and it’s worth every penny.
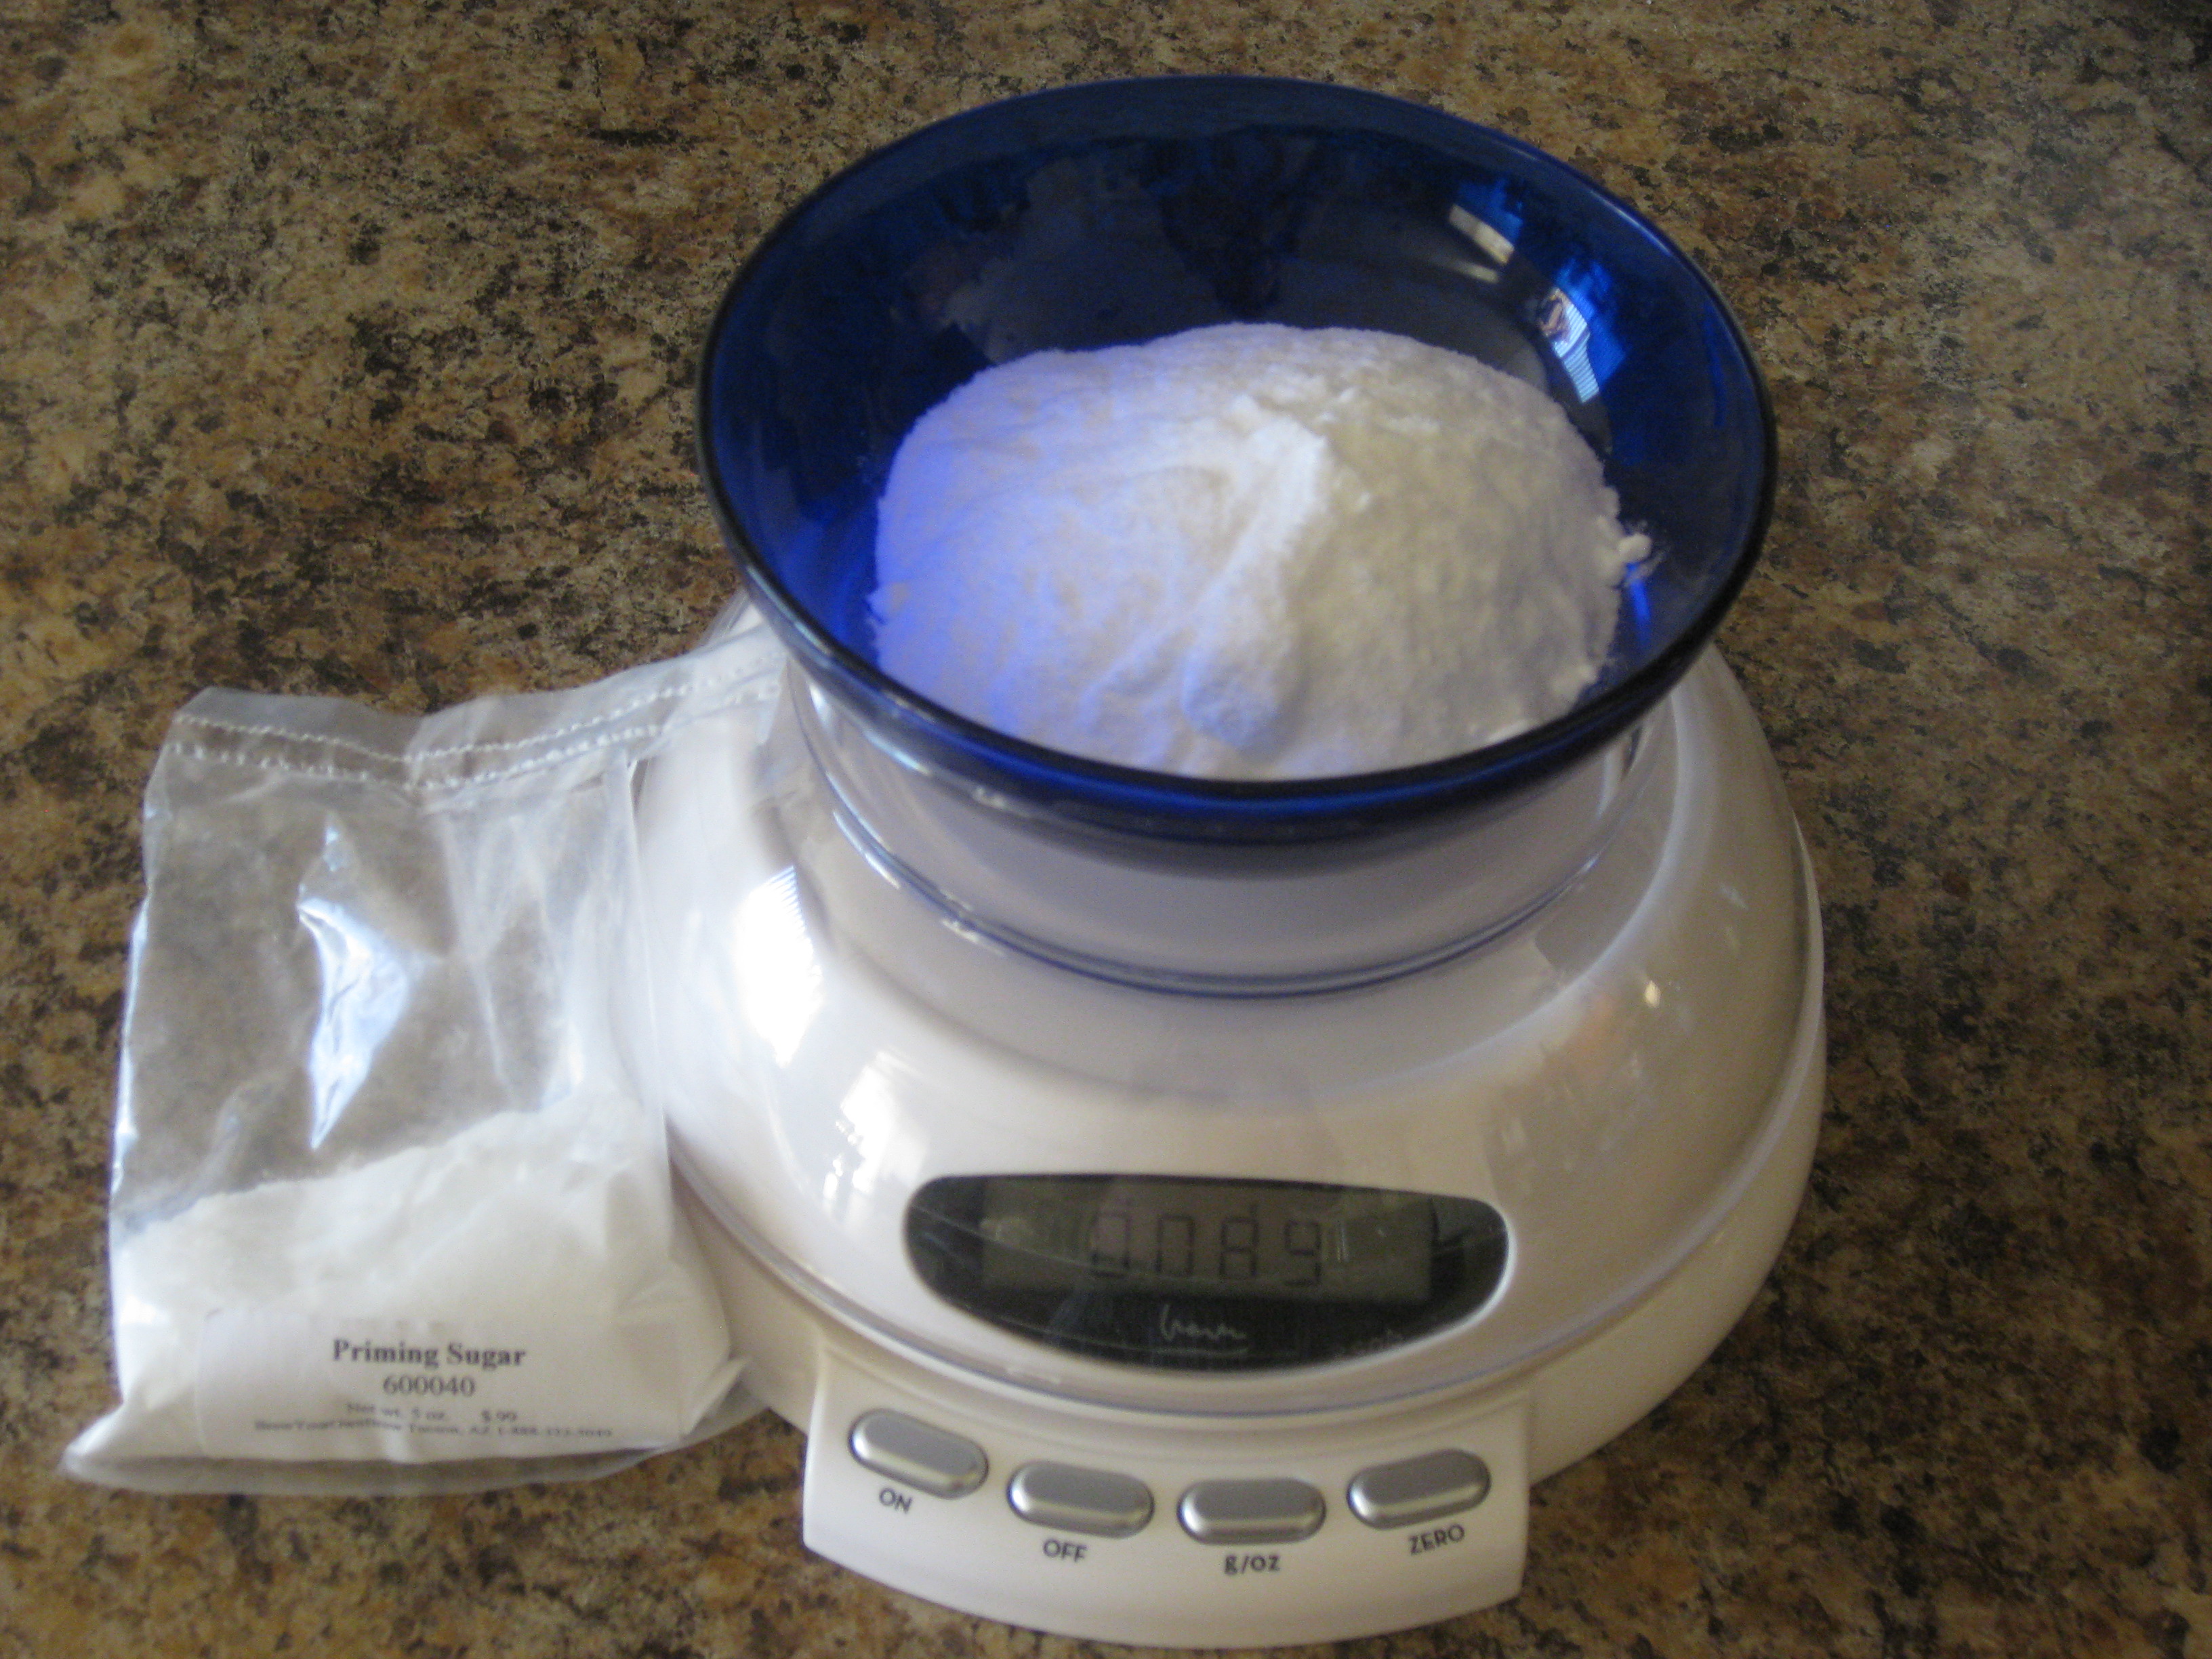
As for which type of sugar you should use, that is entirely up to you. Different kinds of priming sugars may contribute different characteristics to your beer, including honey, however most sugar sold in your local homebrew shop (U.S.) labeled as “priming sugar” is corn sugar, which is said to be relatively flavor-neutral when used to prime. Table sugar, which is usually cane sugar in the U.S., can reportedly contribute apple cider type flavors/aroma to beer.
Whatever sugar you end up choosing, add it to two cups of water in a pan, boil for a few minutes, cool, pour it into your bottling bucket, and add your finished beer. Remember to stir it in thoroughly with the beer with a long spoon. Unevenly distributed sugar in the bottling bucket leads to unevenly carbonated beer bottles which may lead to exploding glass bottles (bottle bombs).
Along with measuring the correct amount of priming sugar with a scale and thoroughly stirring that sugar into your bottling bucket, go the extra step and place your bottles in a closed box just in the off chance something went wrong in the bottling process and a bottle was over-primed or the beer hadn’t completely finished attenuating during primary fermentation.
9. Sanitize Your Bottle Caps Prior to Use
According to Crown Beverage (the maker of oxygen absorbing bottle caps), it’s recommended that you sanitize your bottle caps for two reasons: (1) it helps prevent the last thing that comes in contact with your beer from infecting your beer, and (2) getting the caps wet activates the oxygen absorbing effect. Simply place your caps in a sanitizer solution like Star San for about two minutes, and then rinse the caps off with tap water if you like. Only sanitize the caps you plan on using immediately because once the oxygen absorbing barrier becomes wet, it will eventually lose its ability to absorb oxygen. Also, do not boil your bottle caps on the stove or heat them in the oven as this may cause the gasket insets in the cap to become defective.
While sanitizing your bottle caps is recommended, leaving metal equipment like a bottle capper, bottling brush, or bottle caps in cleaning solutions like One Step or Star San for a prolonged period of time may cause the metal to rust. Even though rust from your bottle caps probably won’t get into your beer to create a metallic taste, you might as well avoid the possibility by only soaking your bottles caps (and any other metal equipment) in your cleanser/sanitizer solution for no more than 10 minutes.
That said, we recently tested a few Crown Beverage bottles caps by placing some in Star San and others in One Step for seven days, and no rusting was detected even when removing the caps from the respective solutions. Your mileage may vary.
10. Use a No-Rinse Cleaner/Sanitizer
Back in 2006, homebrew god John Palmer wrote in his now classic book How to Brew, “If you use bleach solution to sanitize [bottles], allow the bottles to drain upside down on a rack, or rinse them with boiled water. Do not rinse them out with tap water unless it has been boiled first. Rinsing with unboiled tap water is a number one cause of spoiled batches.”
Let’s address two things:
A) While you can use bleach to sanitize your brewing equipment including glass bottles, bleach can corrode steel, copper, brass, and aluminum and get absorbed into plastic if exposed to either for more than 15 minutes. This is why some brewers prefer using a more practical sanitizer like Star San which won’t damage any of your brewing equipment, and also doesn’t require a rinse after using.
B) But back to the original point: while I’m all about sanitation, recommending that brewers must boil (then cool) tap water used for rinsing out bleach (or some other cleaning solution) because of the idea that tap water is allegedly the number one case of spoiled beer, seems a bit excessive. Of course this may also depend on the country in which you live.
According to the U.S. Center for Disease Control and Prevention (CDC), it’s safe to drink the tap water in many countries including the U.S., Canada, U.K., Australia, and New Zealand (sorry South Africa). If the tap water is safe to drink, then it’s probably okay to rinse the remaining cleaning residue out from the inside of your bottles with tap water. Even though the tap water is safe to drink and will most likely not cause an infection in your bottled beer as the beer itself already has preservative features such as alcohol and usually hops, it may still be a good idea to rinse the tap of your faucet with Star San.
Or, better yet, sidestep the issue and simply use a no-rinse cleaner or sanitizer to clean your equipment like One Step or Star San.
If you’re curious about which countries have safe tap water and which do not in case you ever plan on travelling or homebrewing abroad, here’s a nifty infographic created by NeoMam Studios— or you can just click on page 2 of this article below. (Spoiler alert: no countries in South America or Africa made the safe tap water list).
Have any helpful bottling tips of your own? We’d love to hear ’em and other bottlers would too, so feel free to comment below.
Cheers and happy bottling!
[Footnote: Some homebrewers report having success sanitizing or sterilizing their bottles by placing aluminum foil over the mouths and baking the bottles in the over for a given period of time at a particular temperature; 338°F (170°C) for 60 minutes to sterilize per John Palmer. However, as Palmer also points out, “bottles made of soda lime glass are much more susceptible to thermal shock and breakage than those made of borosilicate glass and should be heated and cooled slowly (e.g. 5 °F per minute). You can assume all beer bottles are made of soda lime glass and that any glassware that says Pyrex or Kimax is made of borosilicate.” As I do not have data indicating to what degree various glass types are weakened over time at various temperatures before the glass fails (explodes) under certain volumes of CO2 , I did not recommend the baking method in this article. I care too much about beer for you to take that risk. 😉 ]
Like this blog? Well, thanks- you’re far too kind.
Tweet-worthy? That would be very kind of you:
Want to read more beer inspired thoughts? Come back any time, friend us on Facebook, or follow us on Twitter:
Or feel free to drop me a line at: dan@beersyndicate.com
Hi, I’m Dan: Beer Editor for Beer Syndicate, Beer and Drinking Blogger, Gold Medal-Winning Homebrewer, Beer Reviewer, AHA Member, Beer Judge, Shameless Beer Promoter, and Beer Traveler. Interests? Beer.
